AizaMD™ - Installation & User Guide 2.0
Updated
Complete installation and user guide for AizaMD™ 2.0, covering account setup, Ambient Mode SOAP notes, Schedule, CliniChat, CareTeam Connect, Snippets, and EHR/EMR integration.
Introduction, Installation Links & Video Demo
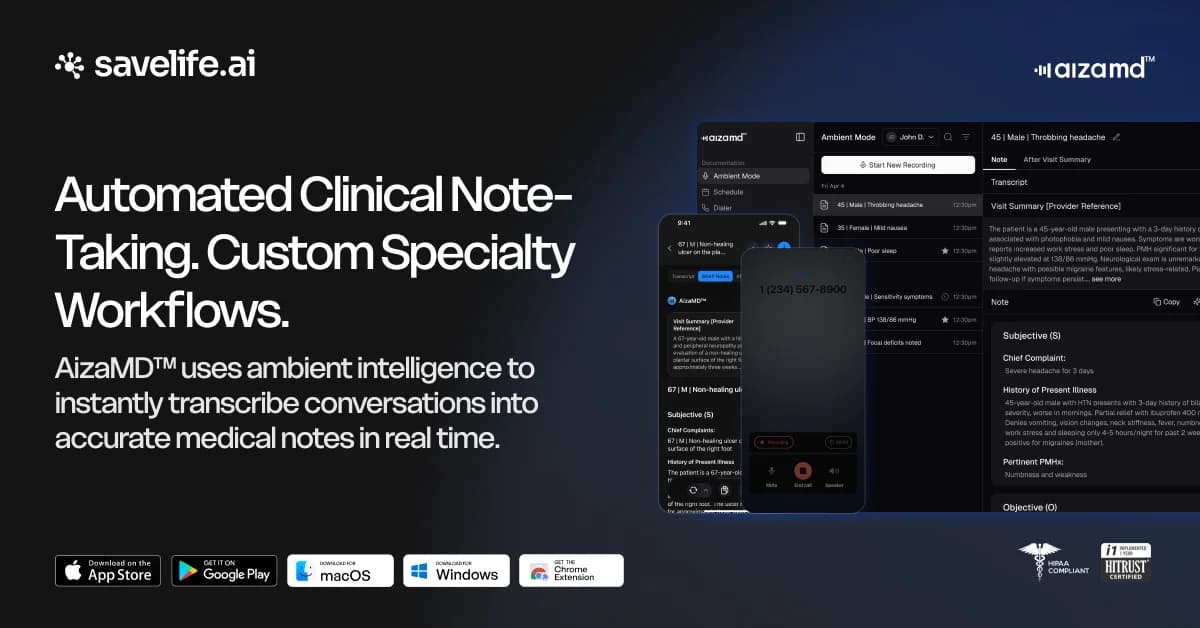
AizaMD™: Automated Clinical Note-Taking. Custom Specialty Workflows.
AizaMD™ uses ambient intelligence to instantly transcribe conversations into accurate medical notes in real time. Its the all-in-one ambient AI documentation tool! Core Features include:
- Ambient Mode: Instantly record clinical conversations to generate structured SOAP notes and after visit summaries.
- Schedule: Access patient appointments directly from EHRs.
- CliniChat: AI-Powered chat delivering smart, contextual responses.
- CareTeam Connect: Share mutual access with trusted team members.
- Snippets: Intelligent Trigger Workflows.
- CliniEnhance: Reduce denial rates and close critical billing gaps with clinical & financial impact smart suggestions.
- EHR/EMR Integration: Integrate with all major EHRs.
Installation Links: Website | AppStore | PlayStore | WebApp | Chrome Extension
Table of Contents
- Step 1: Create Your Account
- Step 2: Log in to the Web App
- Module 1: Ambient Mode
- Module 2: Schedule Mode
- Module 3: CliniChat
- Module 4: CareTeam Connect
- Module 5: Snippets
- Module 6: EHR/EMR Connect
Step-by-Step Guide
This guide will walk you through the steps of getting started with your AizaMD™ account. It also includes training resources to help you fully understand the capabilities and benefits of AizaMD™.
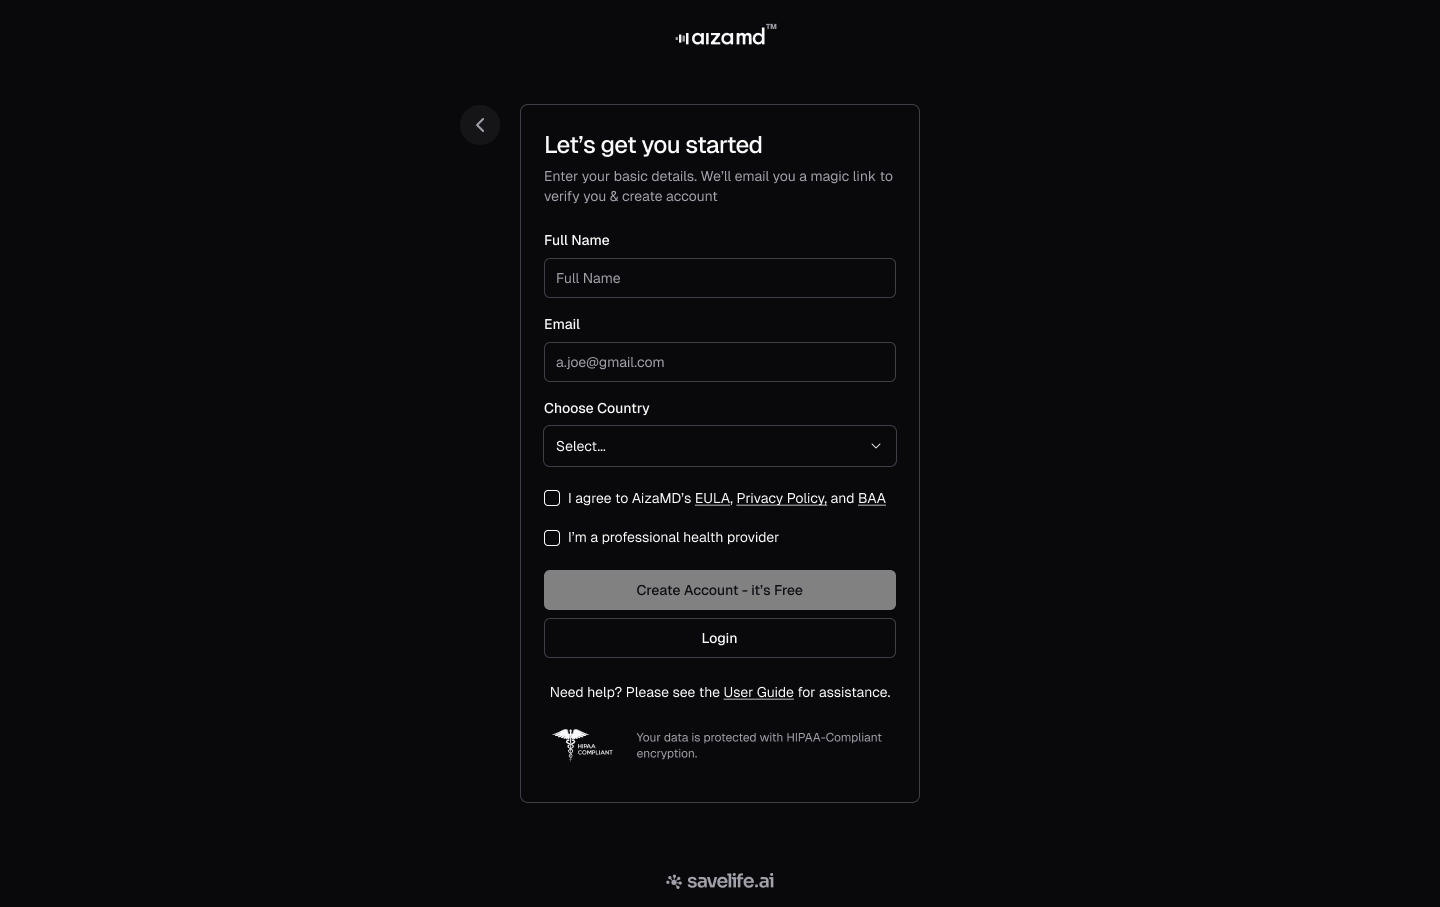
Step 1: Create Your Account ✅
- Visit our website aizamd.ai or navigate to the web app app.aizamd.ai
- If you do not have an account, start by creating one.
- Click on "Create Account - it's free".
.webp)
Enter Your Details
- Get started by entering your full name, email, and country, then click "Create Account – it's free".
- Be sure to check the required boxes to enable account creation.
.webp)
Check Your Email Inbox
- A Magic Link will be sent to the email address you provided.
- Click the "Activate Account" button in the email to verify your account and you will then be redirected to the password creation page.
- Click "Create Account."
.webp)
.webp)
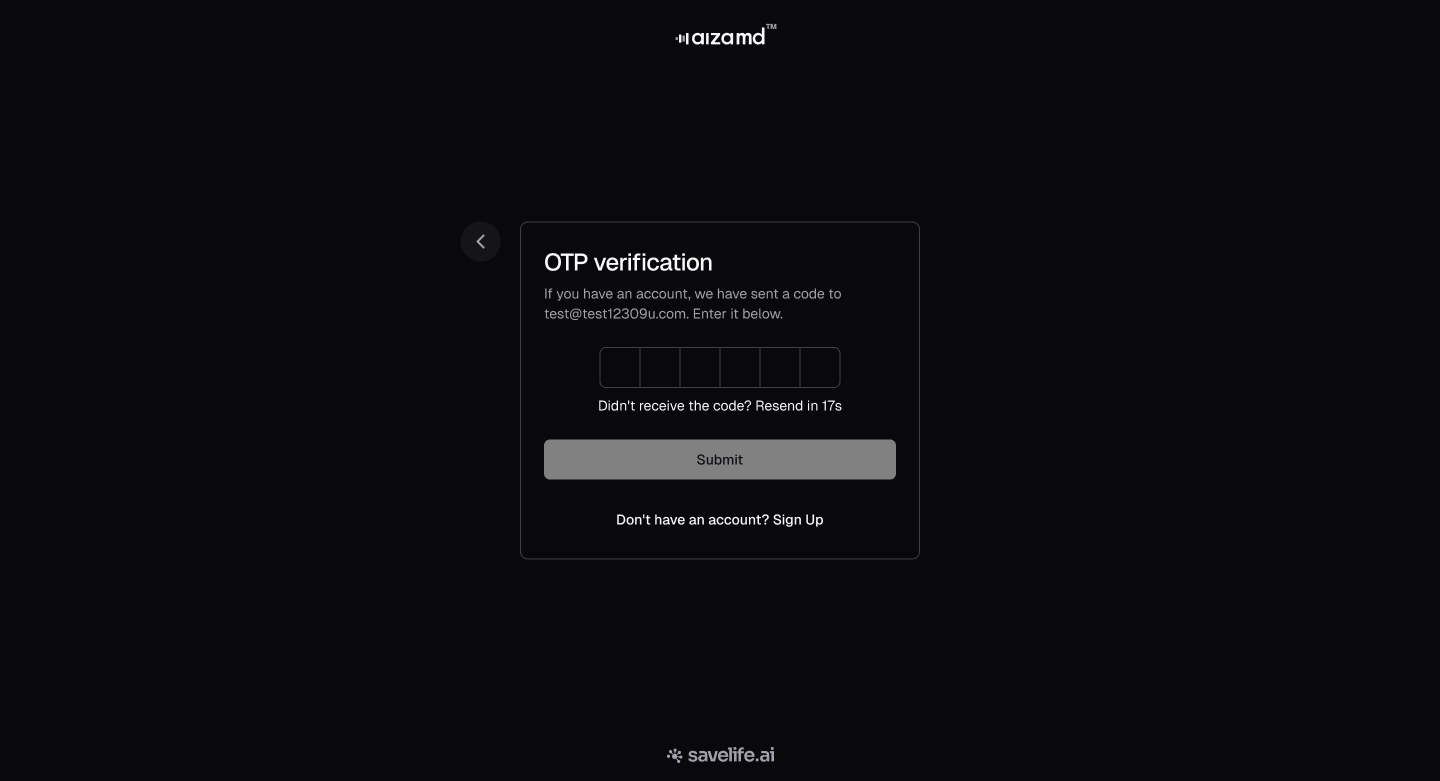
Password Creation
- Create a password to continue.
- Check your email for the verification code.
- Enter the OTP verification code and click on 'Submit'.
.webp)
.webp)
- Ensure your password meets the guidelines by including at least 8 characters including uppercase and lowercase letters, numbers, and special characters.
.webp)
.webp)
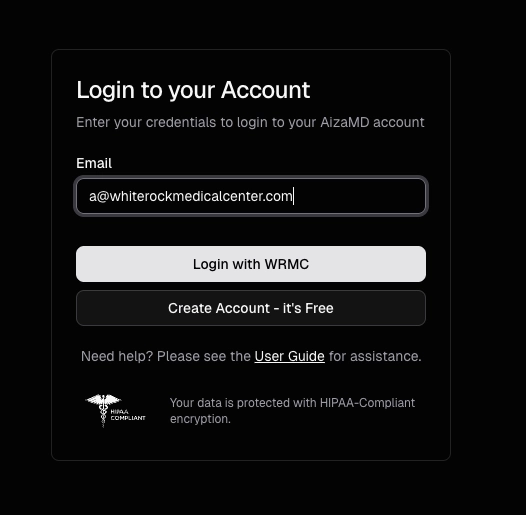
Logging In with WRMC SSO
Recommended for WRMC Email Users
- On the AizaMD™ login screen, enter your WRMC email address.
- The "Login with WRMC" button will appear.
- Select the "Login with WRMC" button.
- You'll be redirected to the WRMC portal.
- Enter your WRMC email and password.
- After authentication, you'll be directly redirected back to AizaMD™.
Step 2: Log in to the Web App 🔑
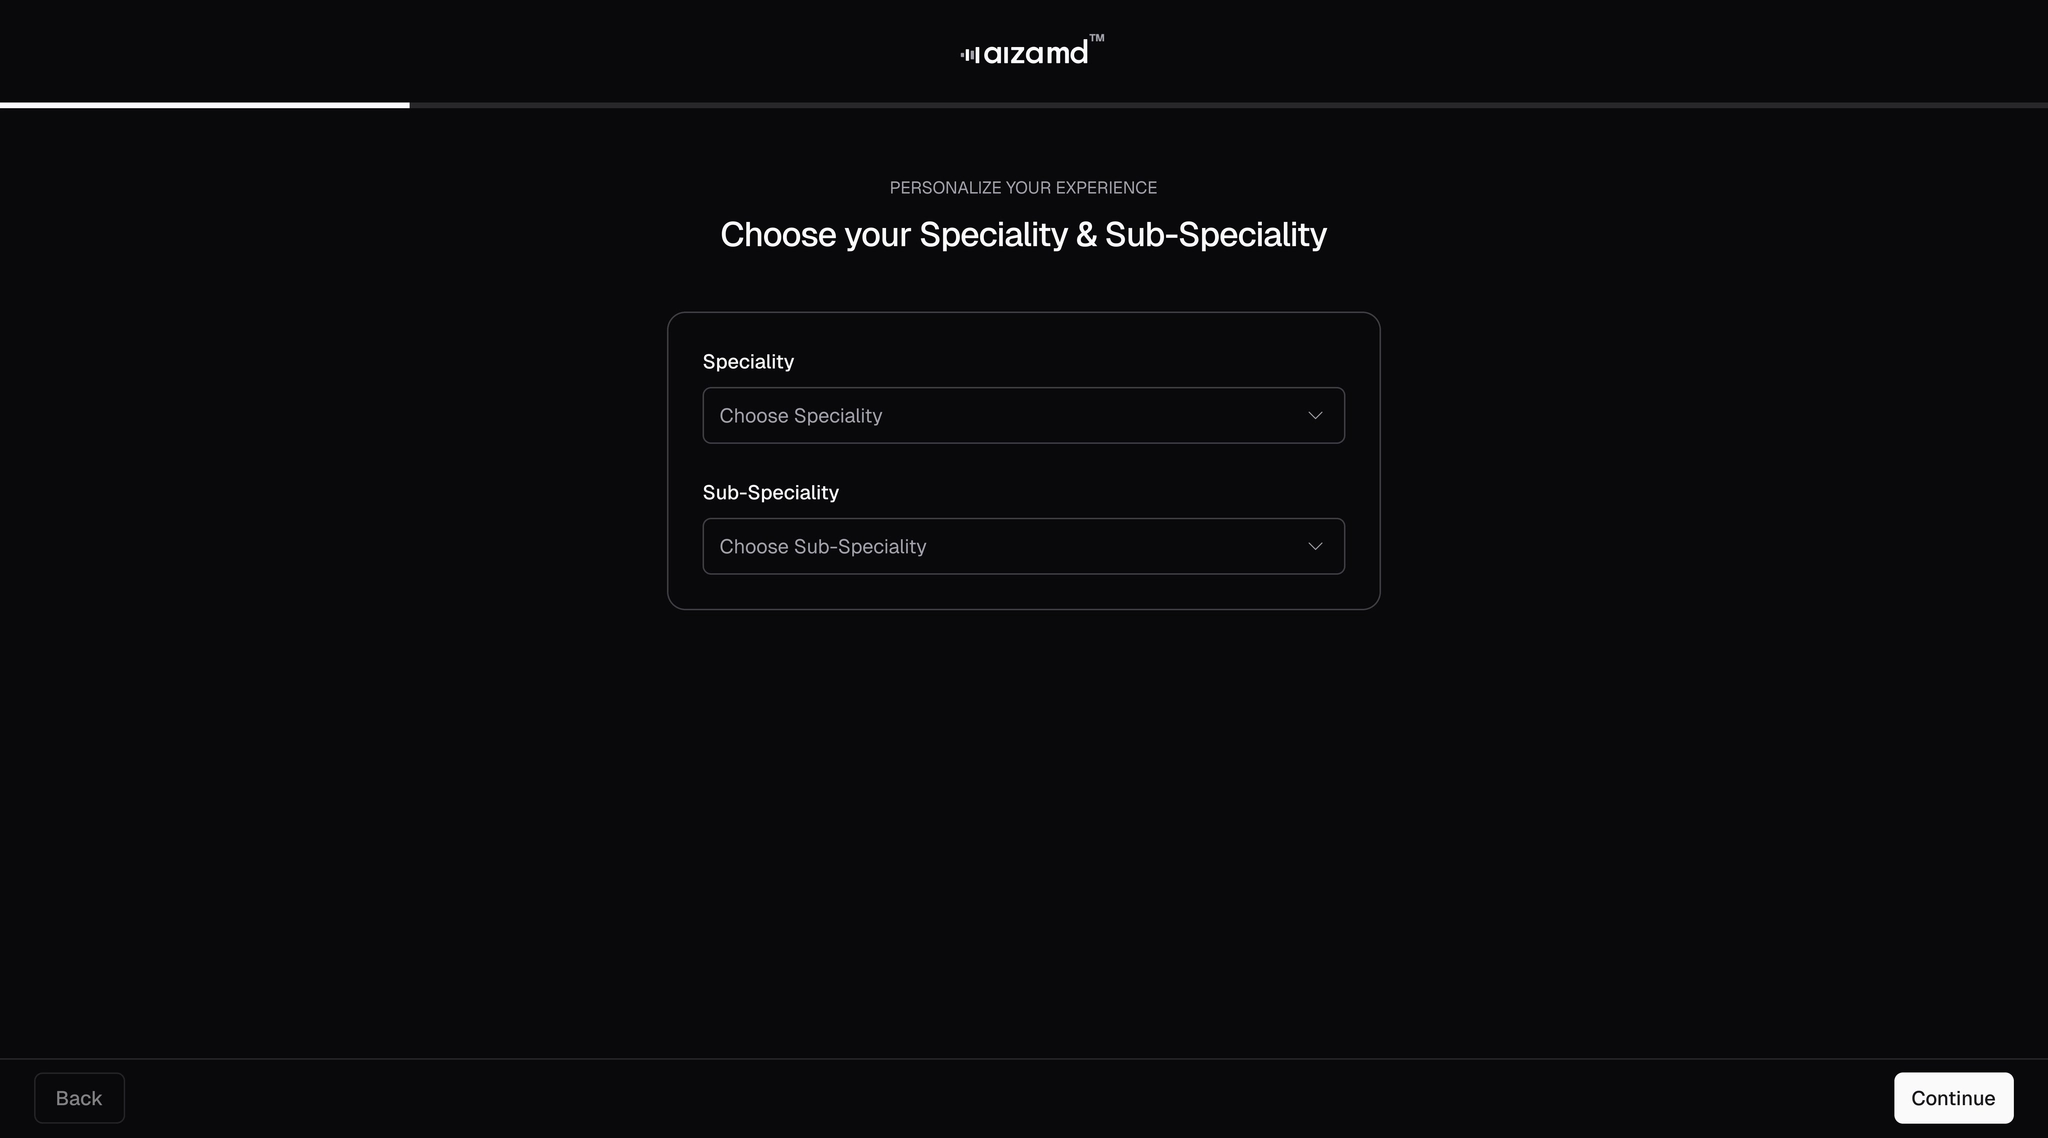
Set up your account
- Select your specialty and subspecialty from the available list.
- Choose the options that best match your primary and secondary care settings.
- Click "Continue."
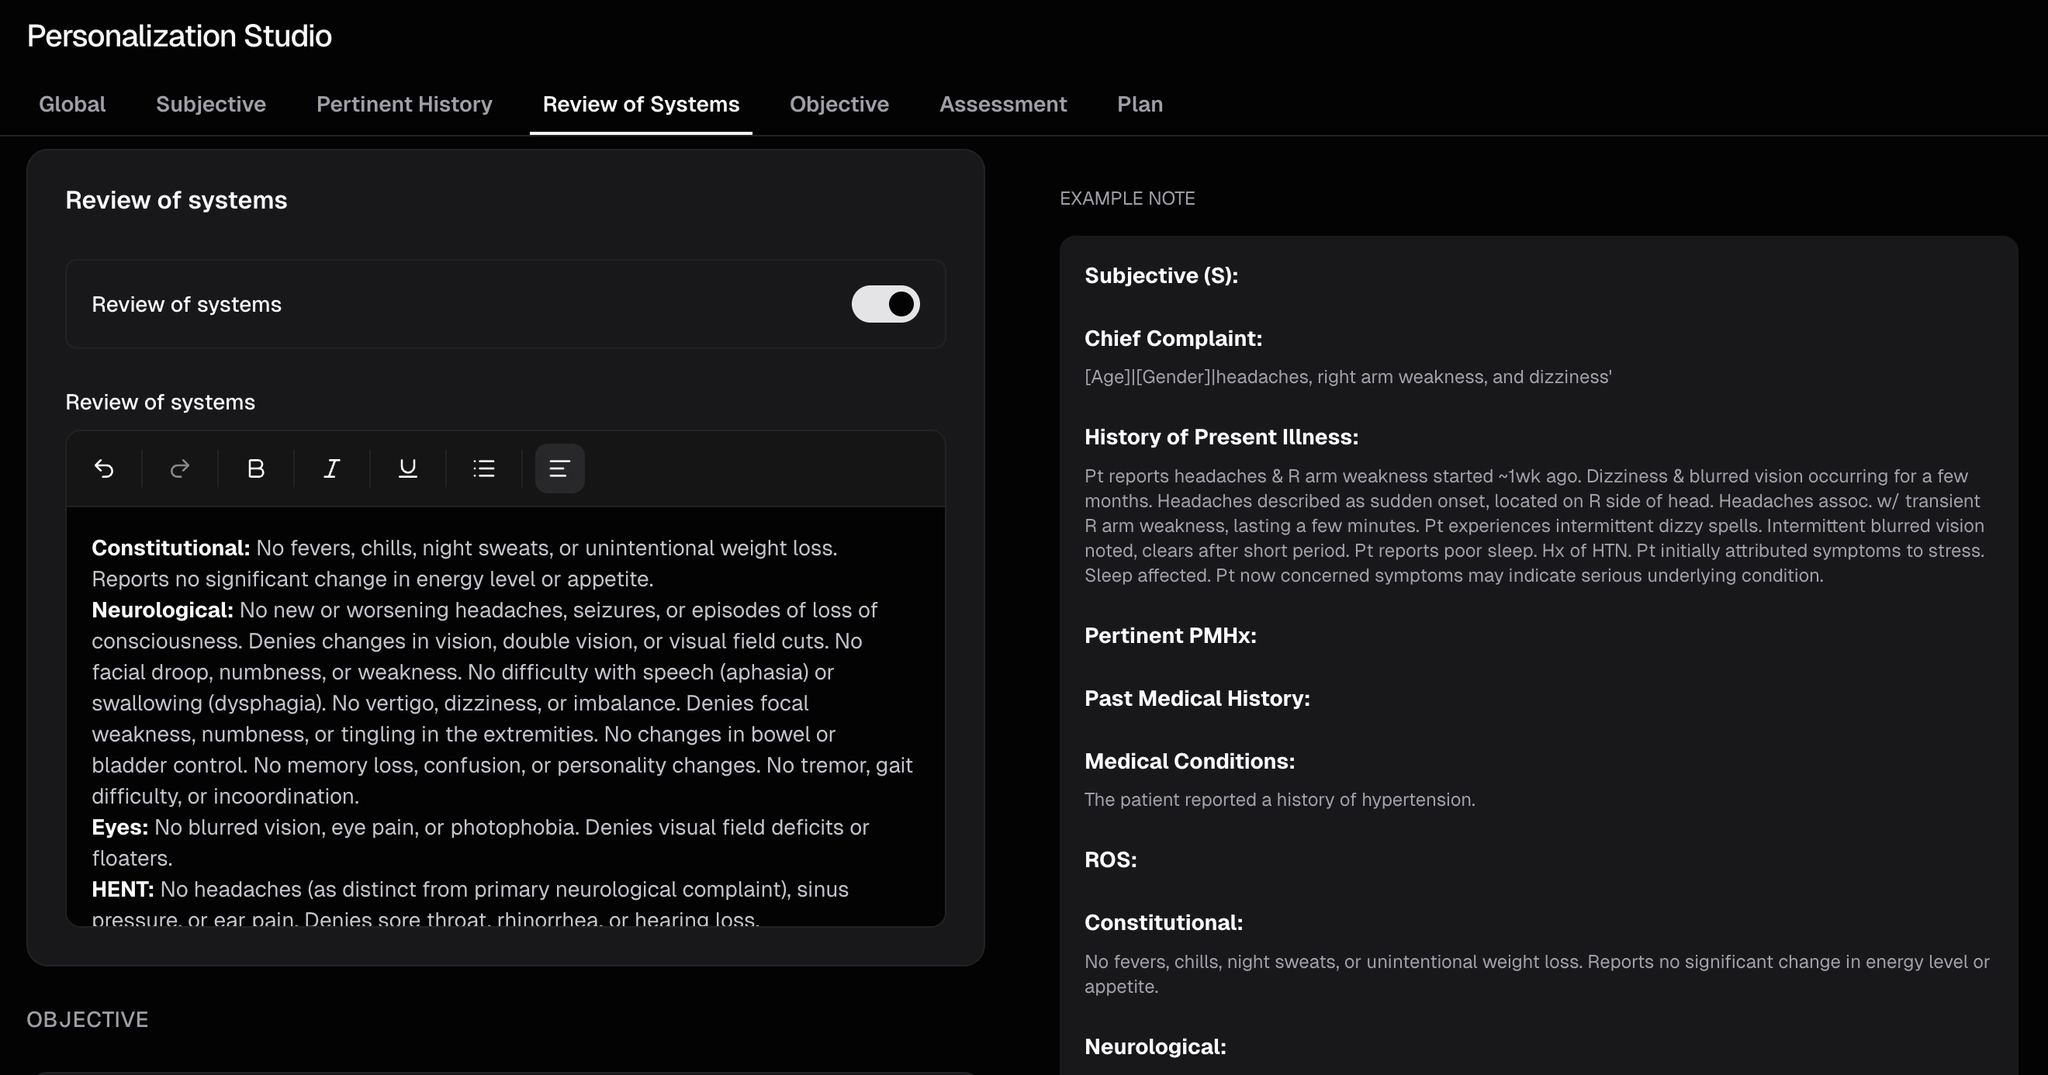
- Enable CliniEnhance if you wish to use this paid feature.
- Choose your preferred AI assistance level, note structure format, assessment & plan organization, and select options for subjective, pertinent history, ROS and objective. The example note displayed on the right will update automatically as you make selections.
.webp)
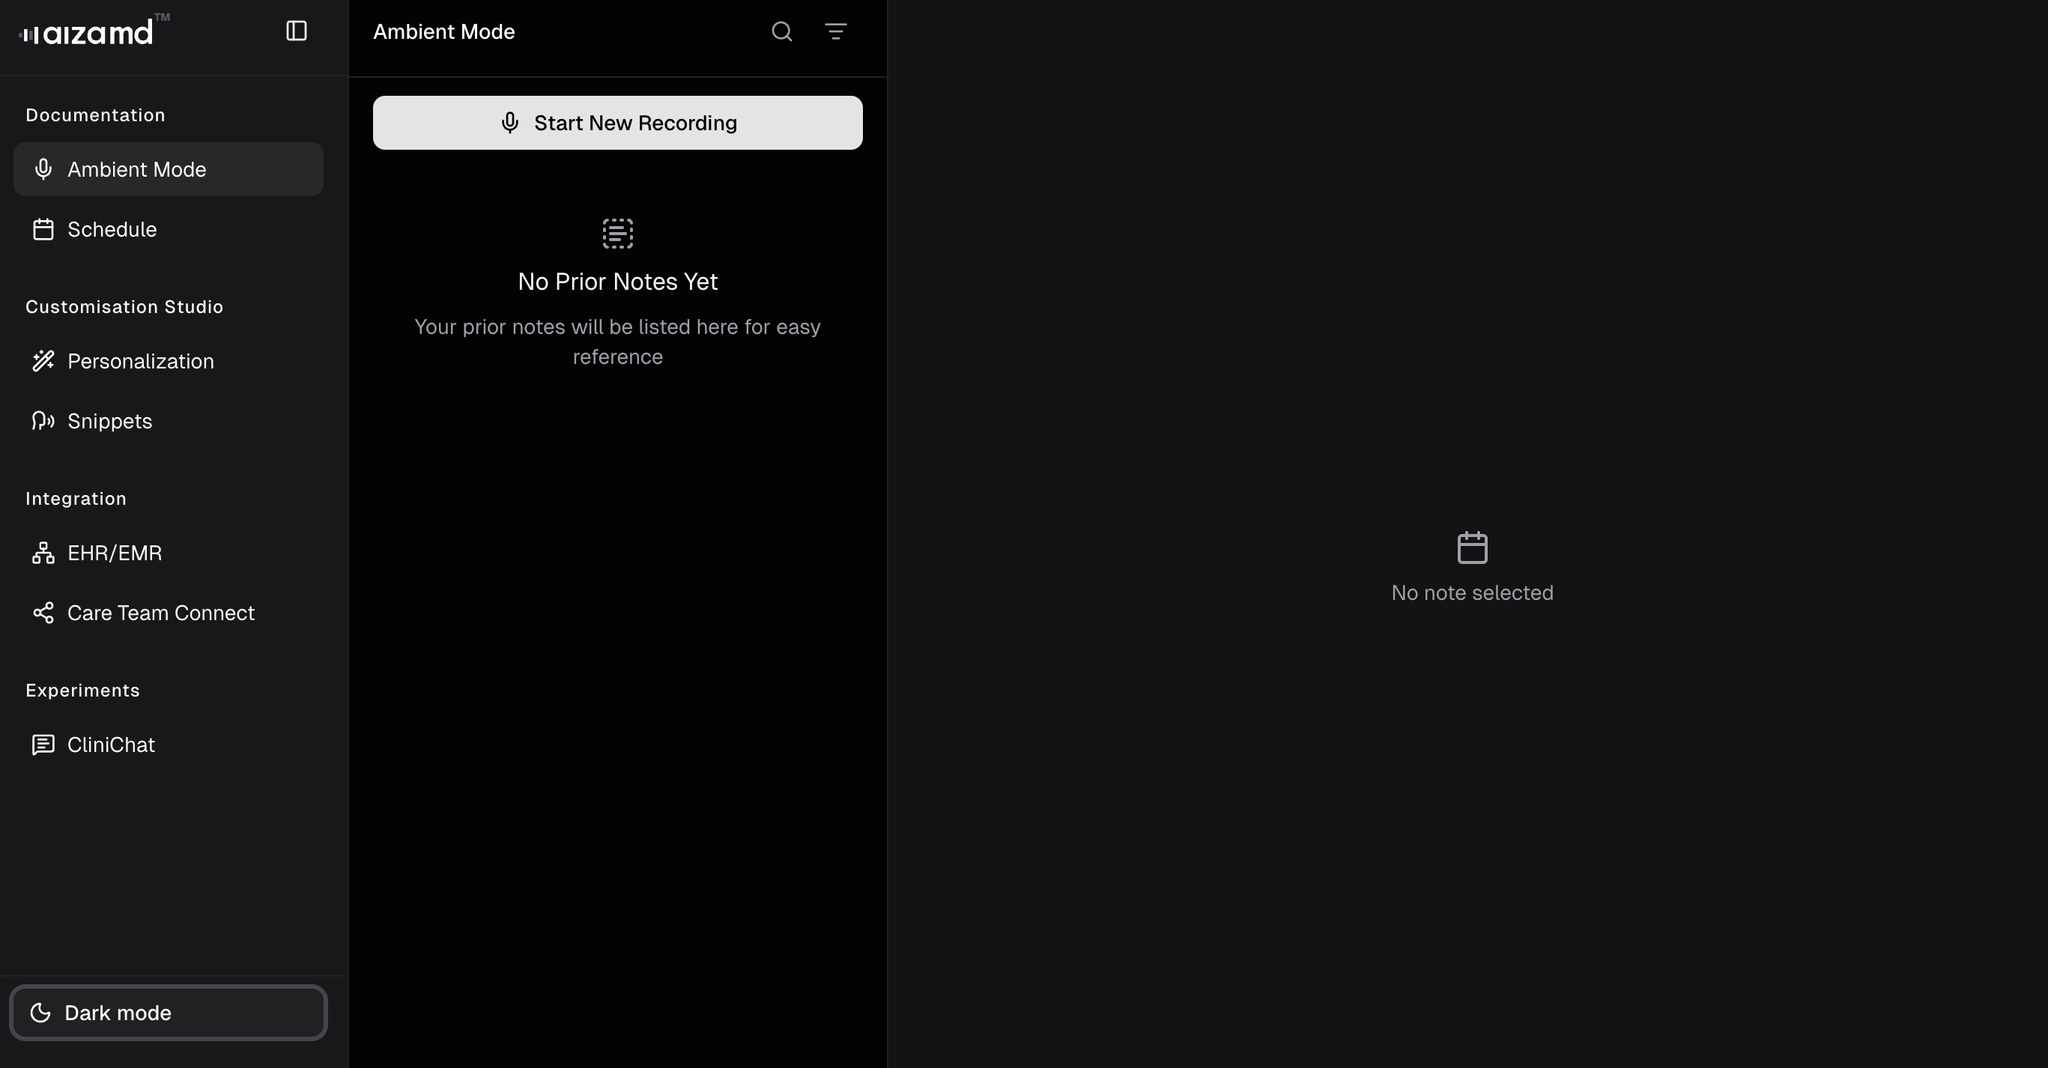
Module 1: Ambient Mode 📄
Create Your First SOAP Note & After Visit Summary
- Navigate to the "Ambient Mode" module within the AizaMD Web App.
- Select a physician from the dropdown list.
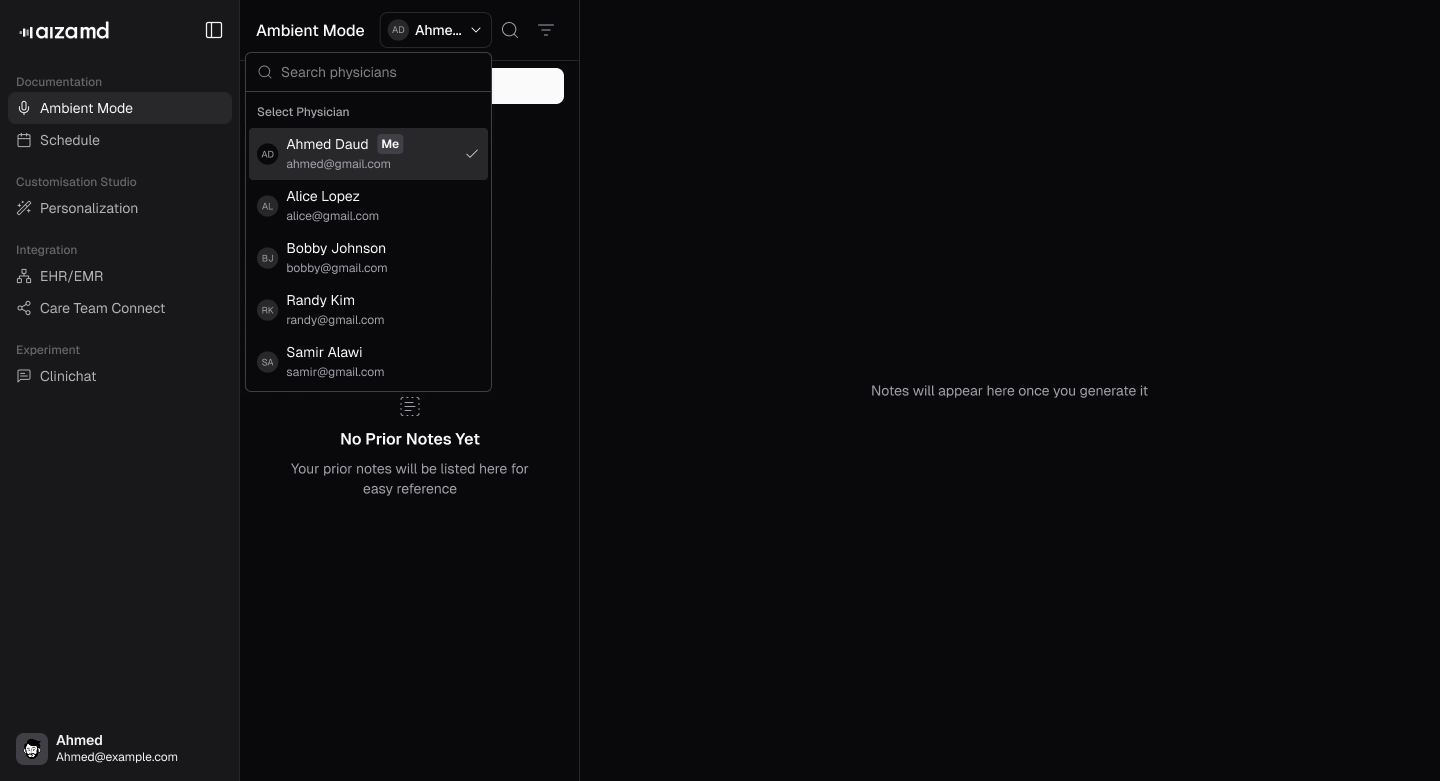
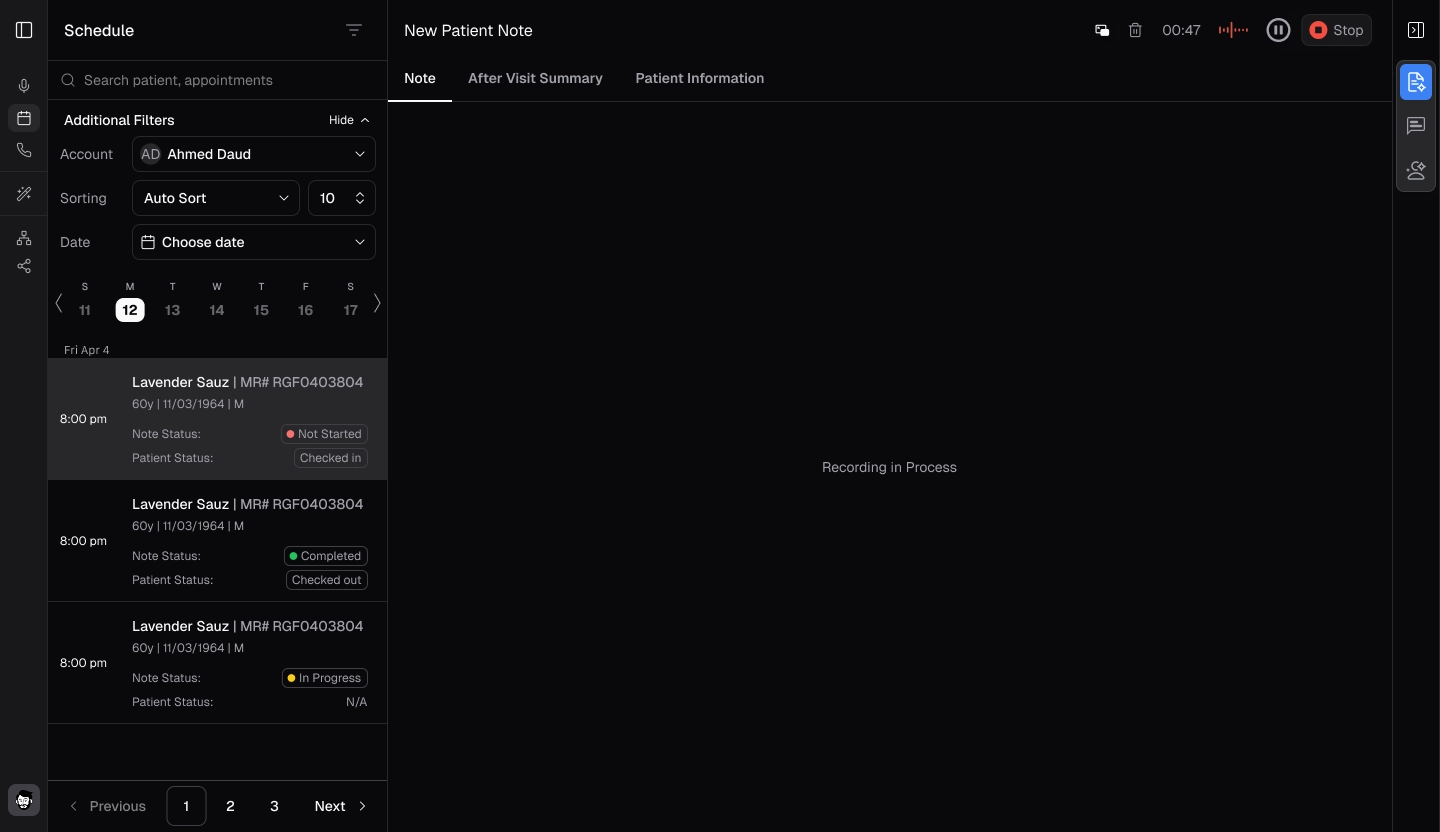
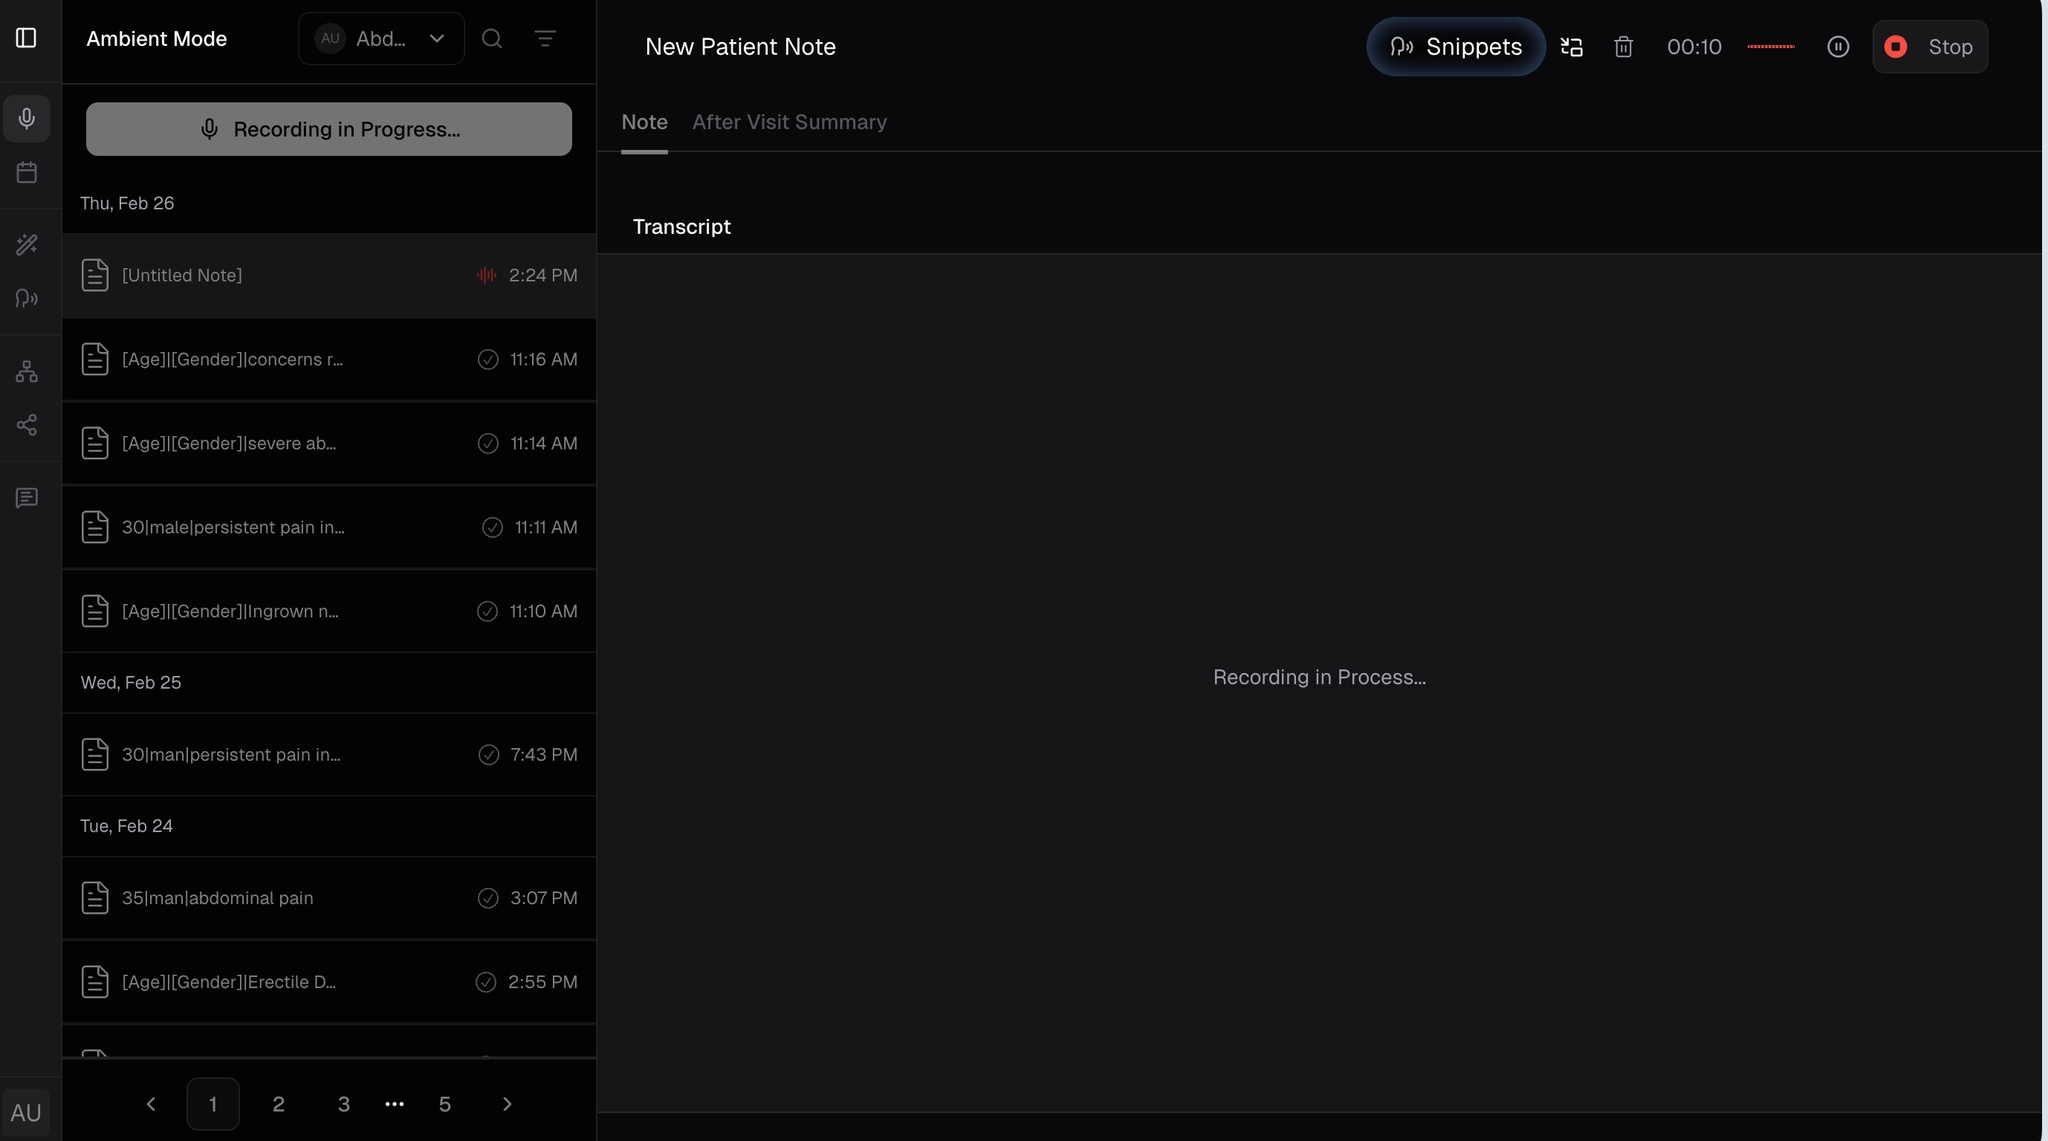
- Click "Start New Recording" to record your provider-patient interaction.
.webp)
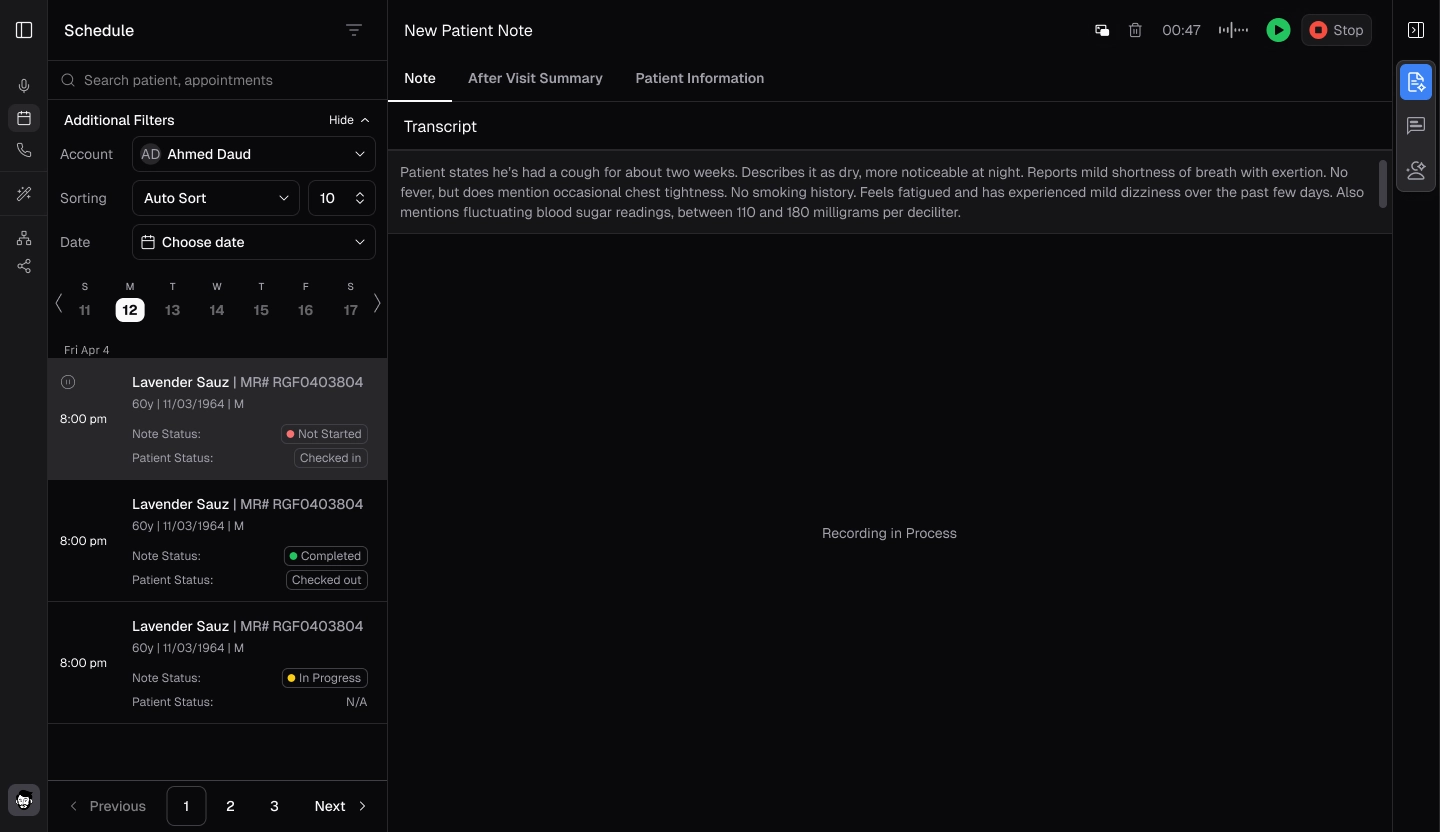
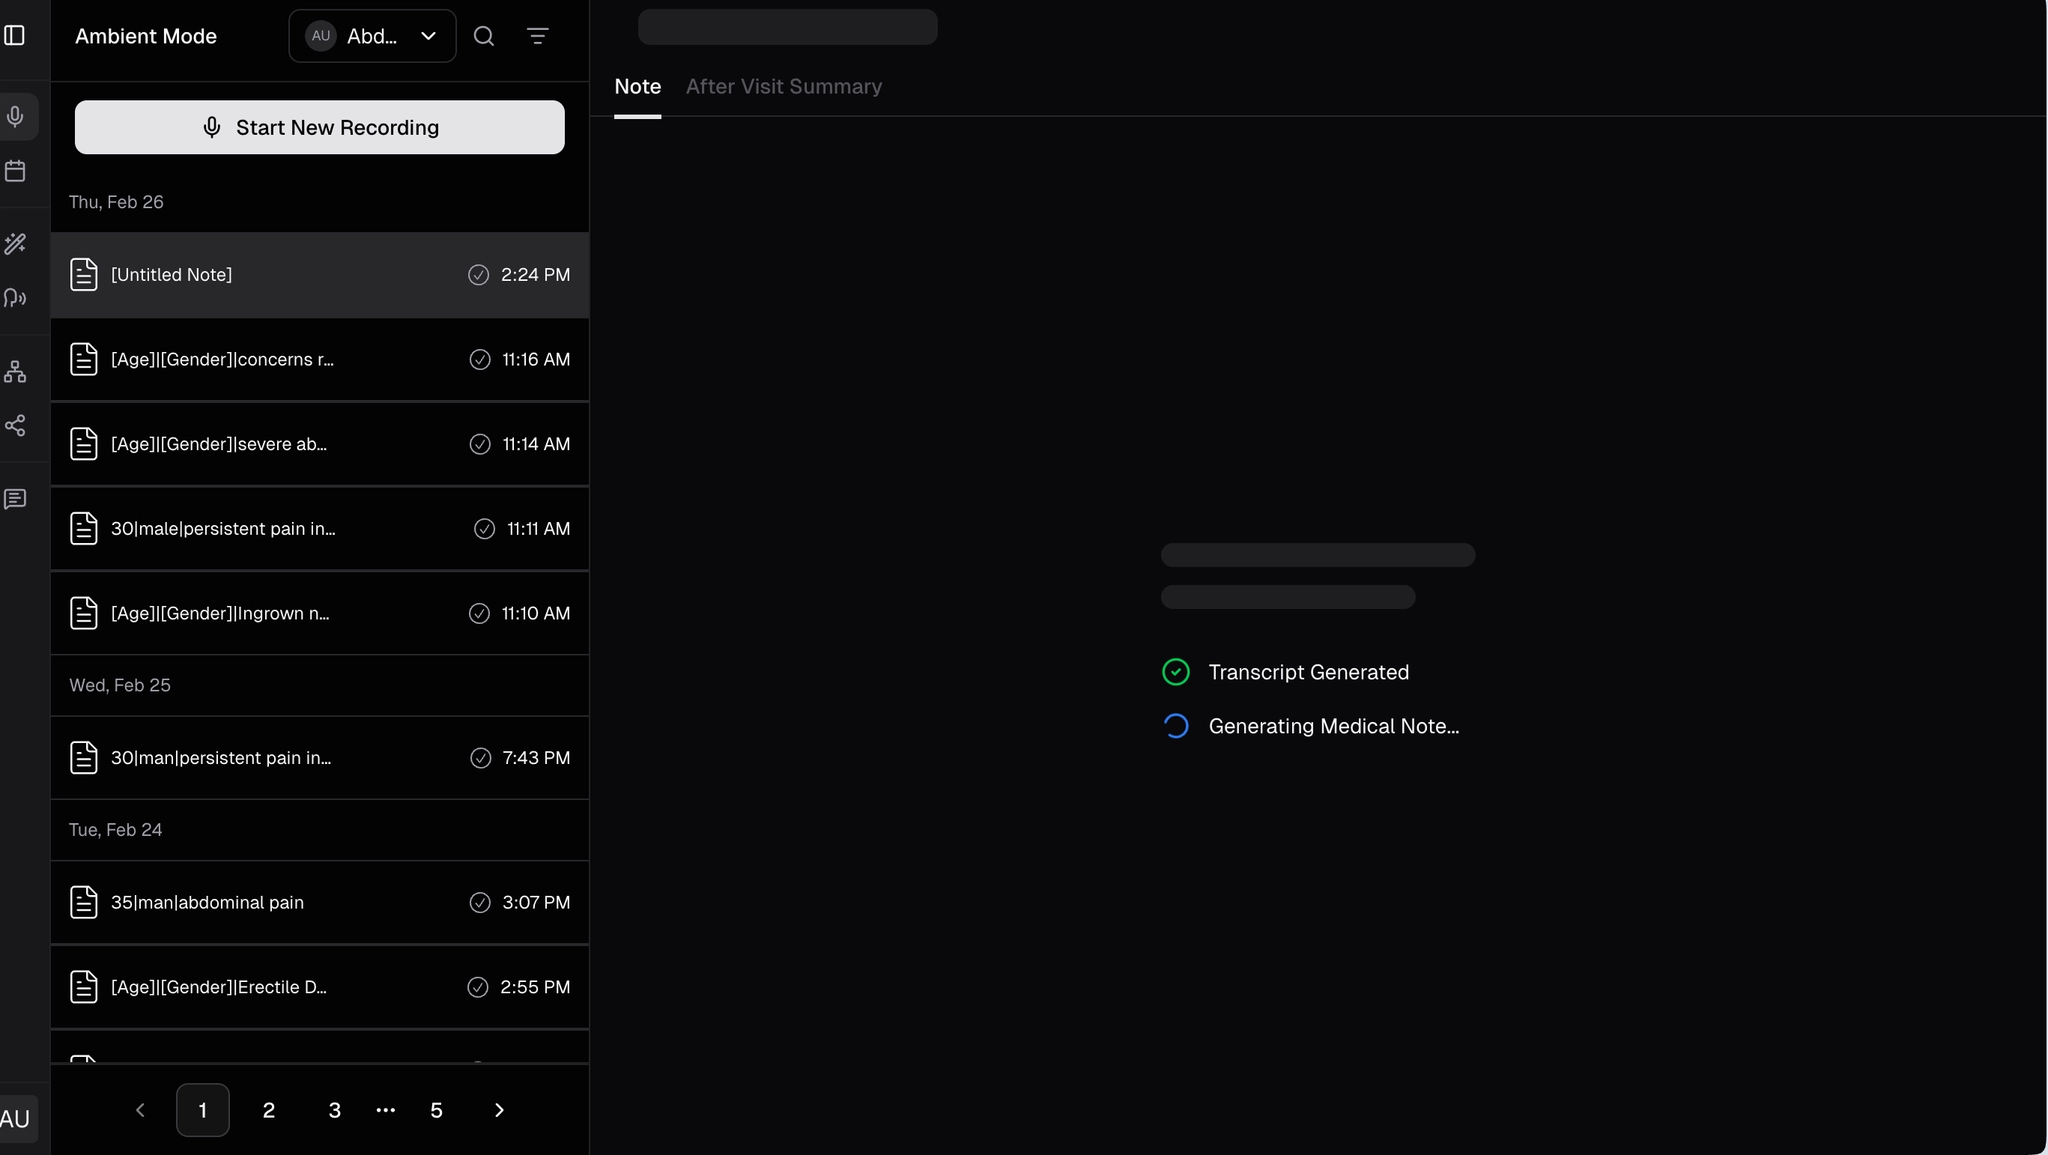
- Click the red "Stop" button to finish recording.
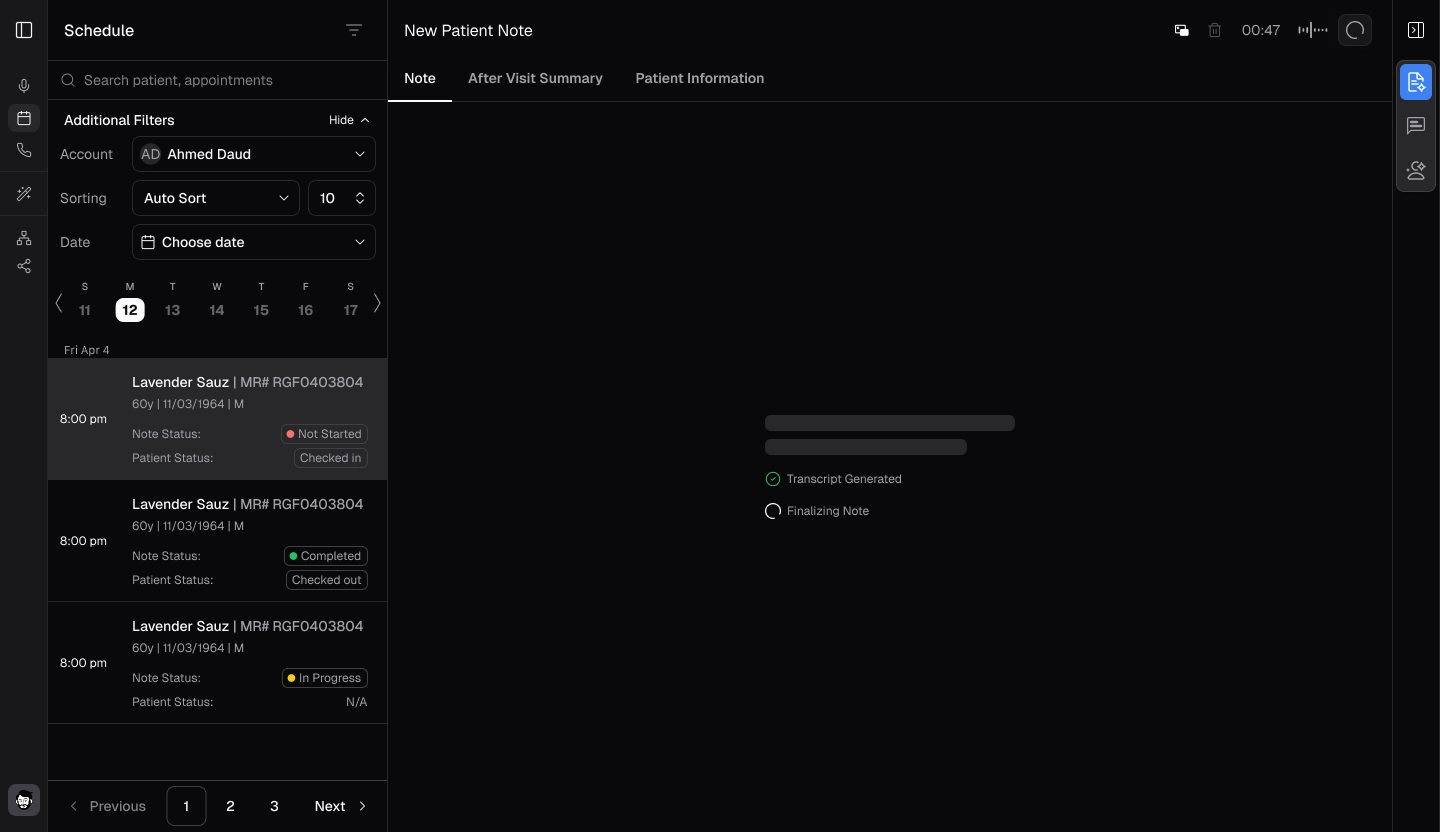
- The transcript will then be generated.
.webp)
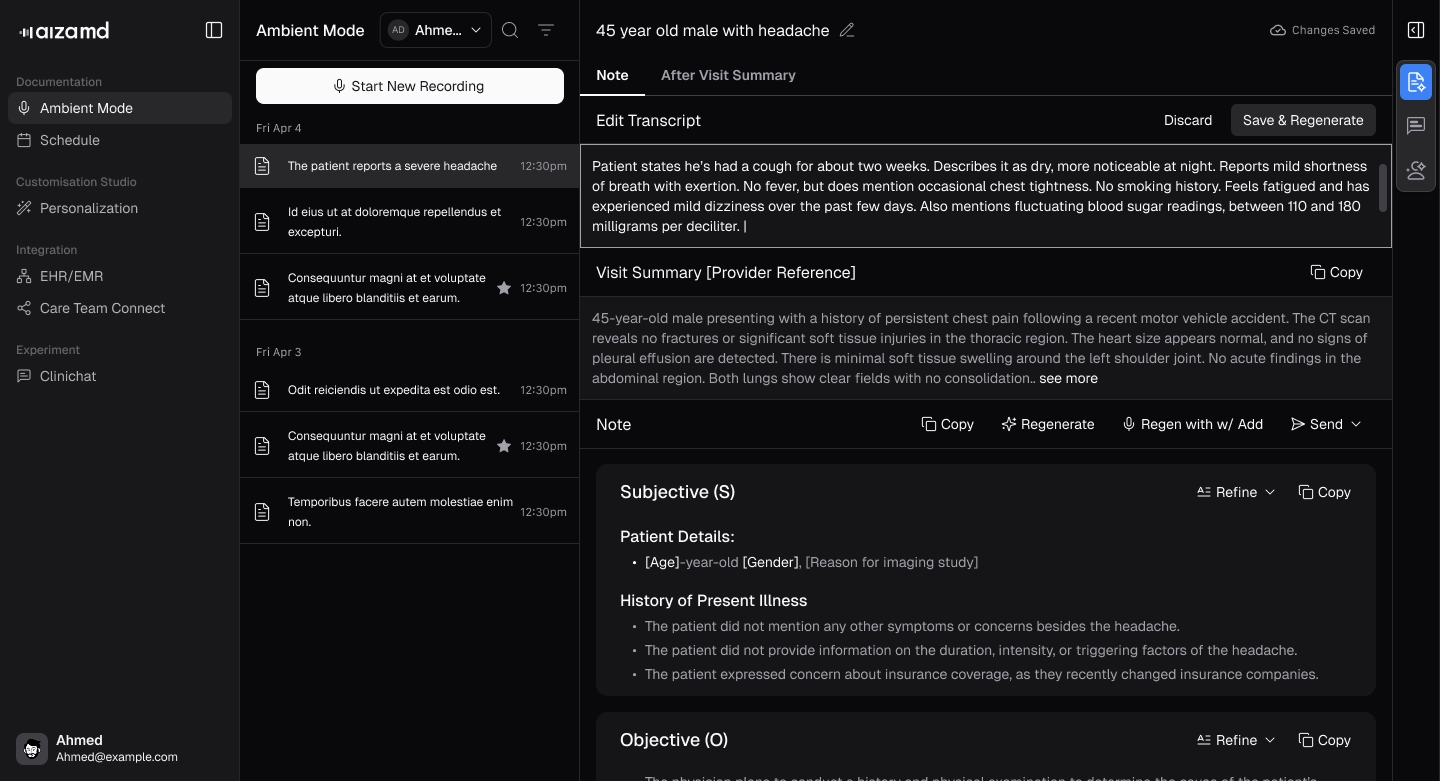
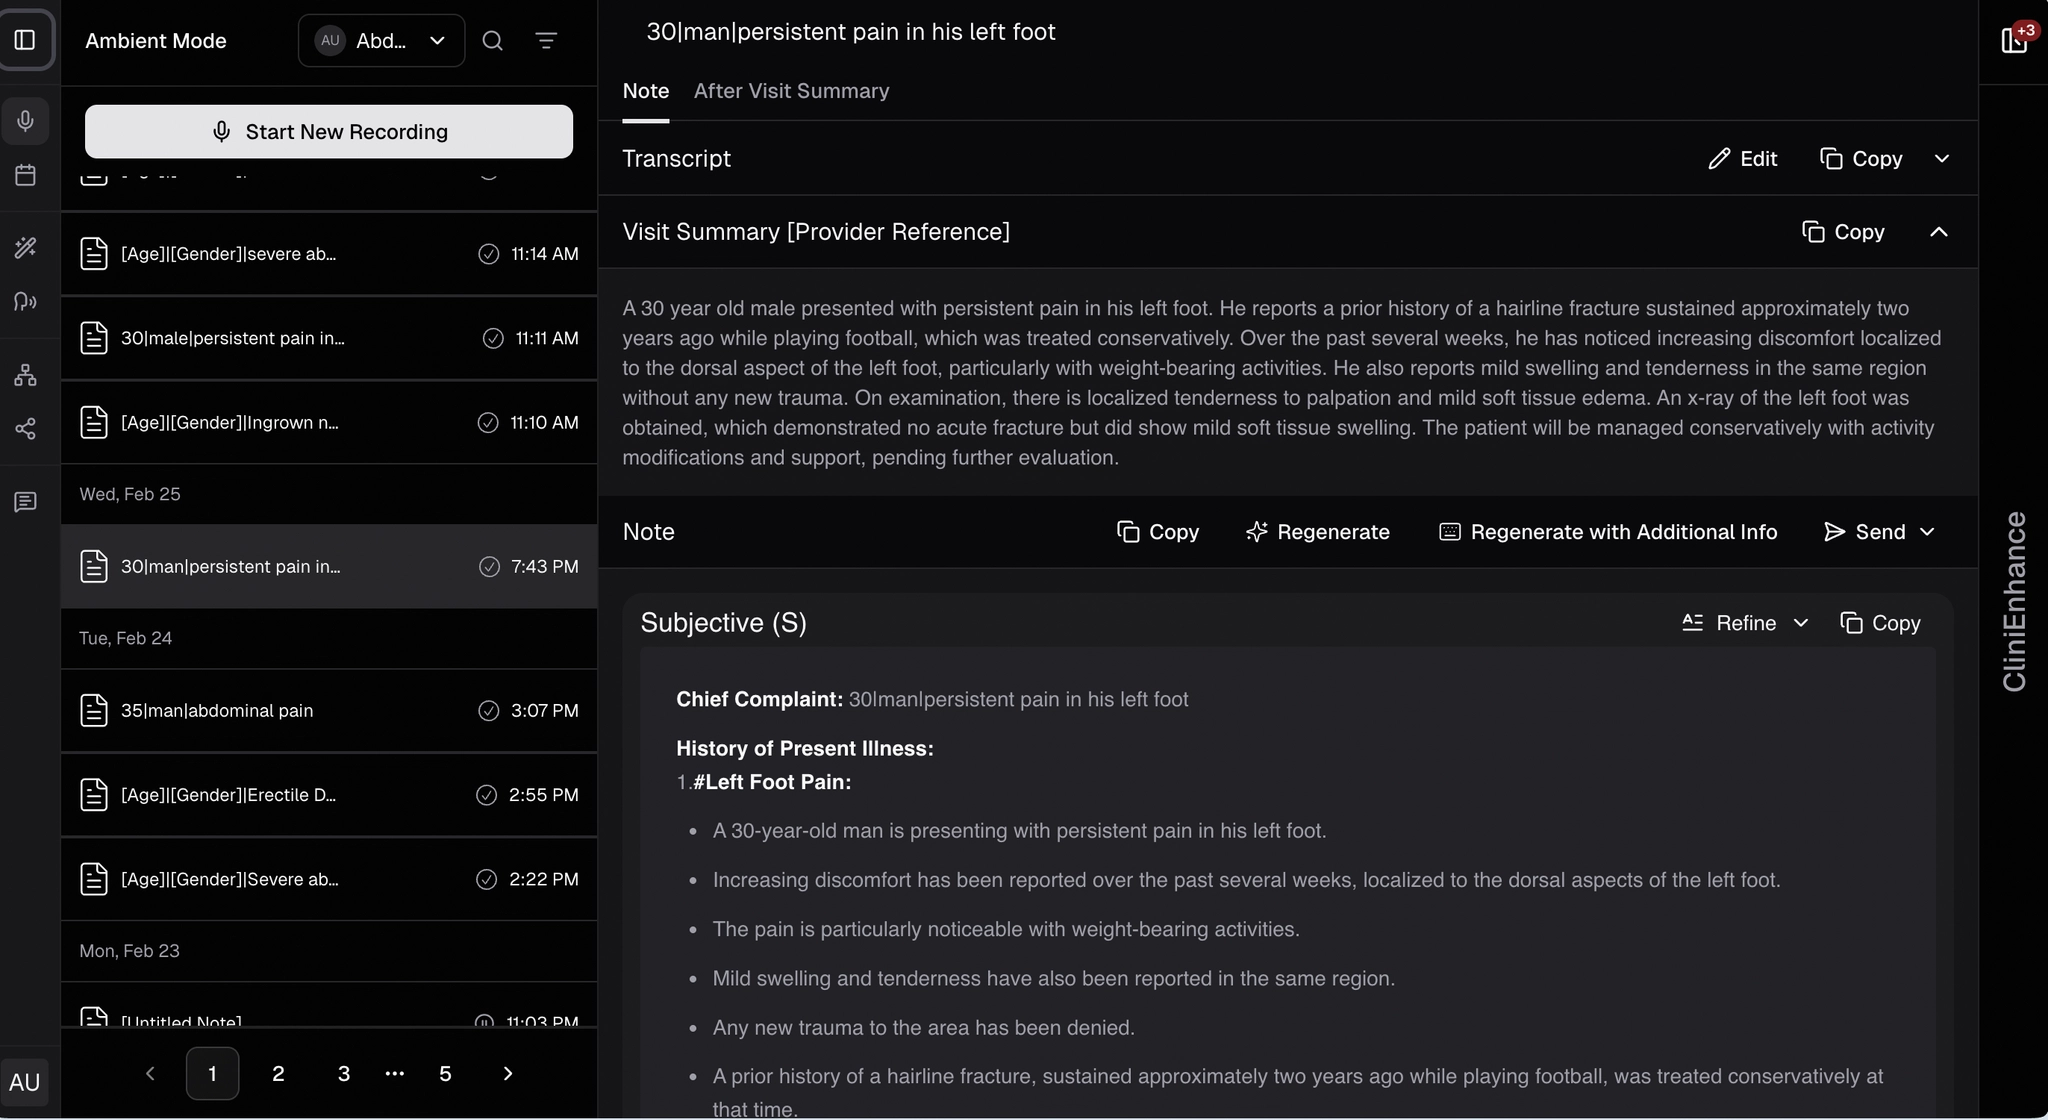
- Audio recordings are available when you click on the note on the left side panel with the complete transcript.
- ICD-10 and CPT codes are applied automatically.
%20(1).webp)
.webp)
- Review auto-generated SOAP notes and edit them according to your preference. You can regenerate the notes by clicking on "Regenerate". Transcript can be edited as needed.
- To view the complete rationale, including the issue description, clinical impact, financial impact, and relevant guidelines, click the first icon displayed on the right side of the screen among the three icons.
%20(1).webp)
- You can view the After Visit Summary by clicking on it. The summary can be edited and copied as needed.
.webp)
- To save your edits, click "Save Changes."
.webp)
.webp)
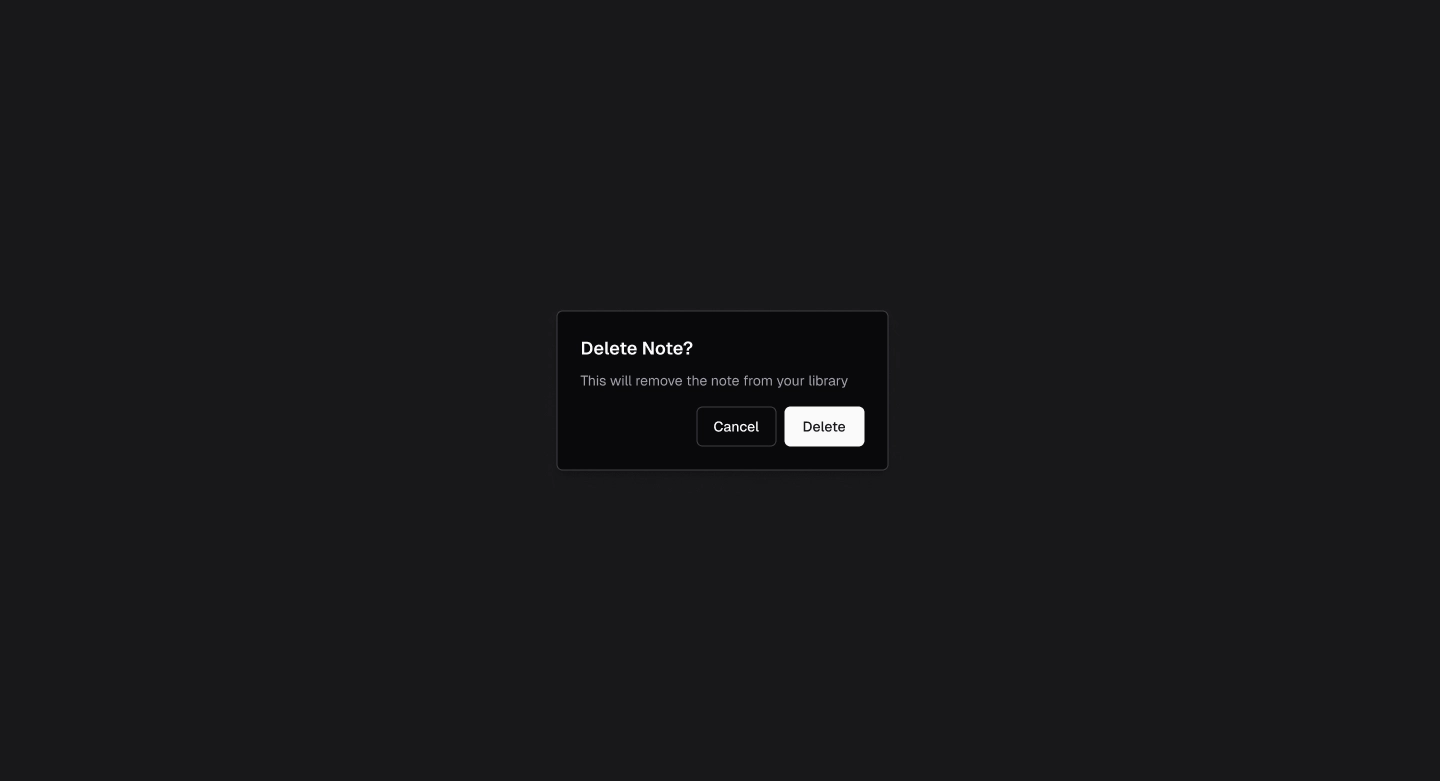
Delete a SOAP Note
- To delete a SOAP Note, click on the three dots and select "Delete." A pop-up will appear requesting confirmation before the note is deleted.

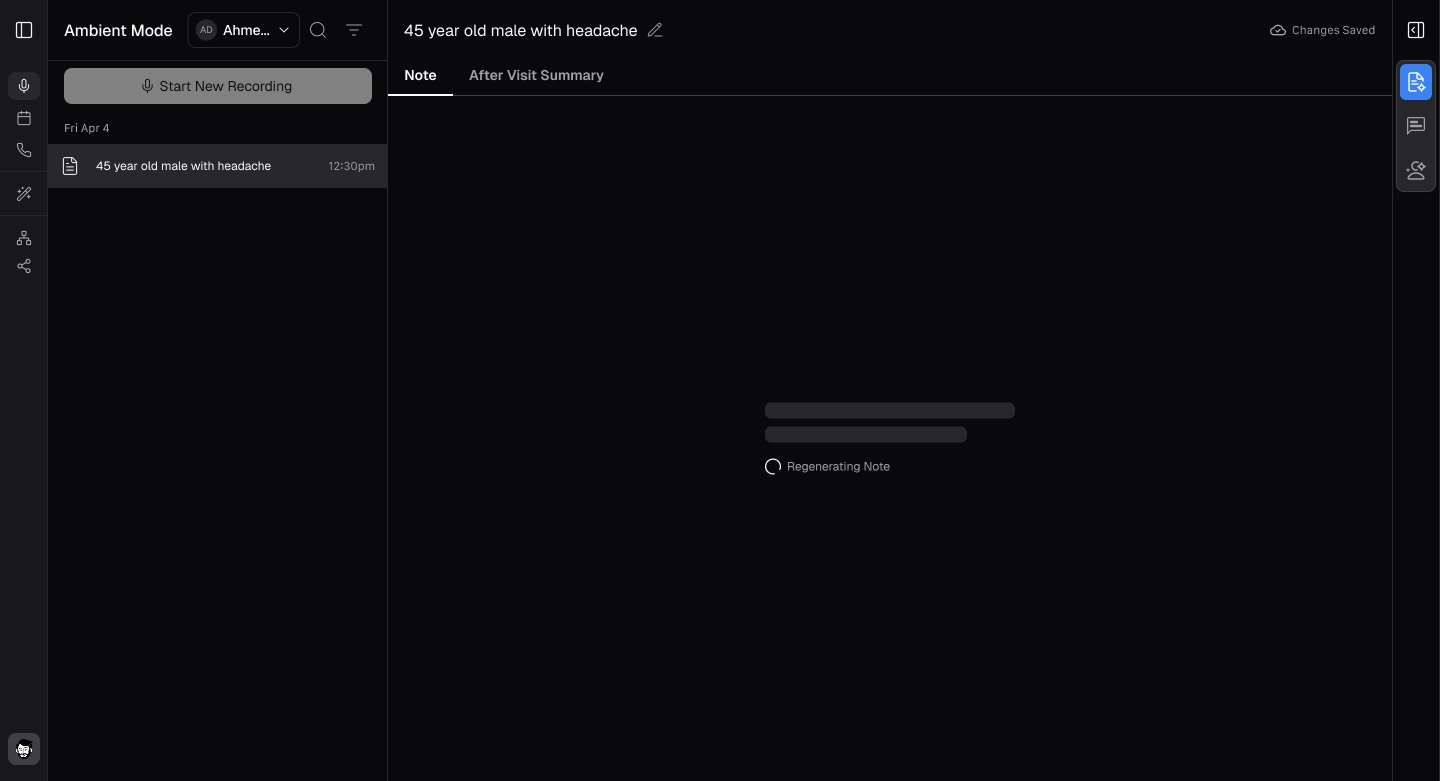
Regenerate a SOAP Note
- Click the "Regenerate" button next to the edit button. The note's structure and format will be refreshed using AI, while the content remains unchanged.
.webp)
.webp)
.webp)
.webp)
- Click on "Regen with Add" to regenerate the note with additional instructions. This feature allows you to refine specific sections using your custom guidance.
.webp)
- A pop-up will appear, prompting you to choose whether to record or type your input.
- Select 'Record' to start a new recording.
.webp)
- Click 'Type' to regenerate the note using typed input.
.webp)
.webp)
Note Generation Failure
- If the audio is unclear or incorrect, a notification will pop up stating that the note could not be generated.
.webp)
.webp)
Searching for Notes
- To search for a note, simply type keywords into the search bar located at the top of the page.
.webp)
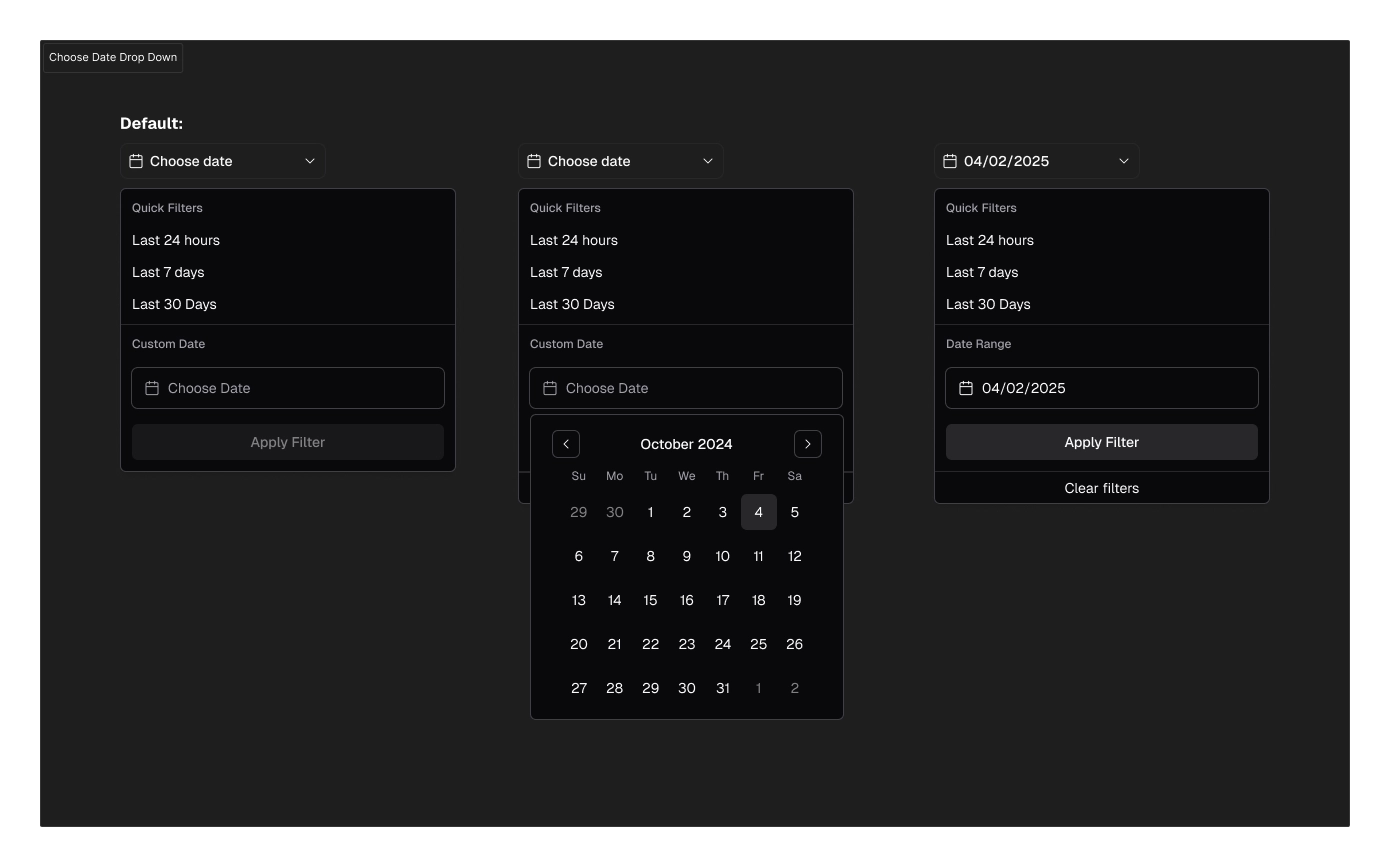
Using Filters
- To mark a note as a favorite, click on the three lines and select favorite with the star next to it.
- To use filters, click the icon next to the search bar and select "Favorite" to view only your favorite notes, or "All Notes" to see all notes.
.webp)
.webp)
.webp)
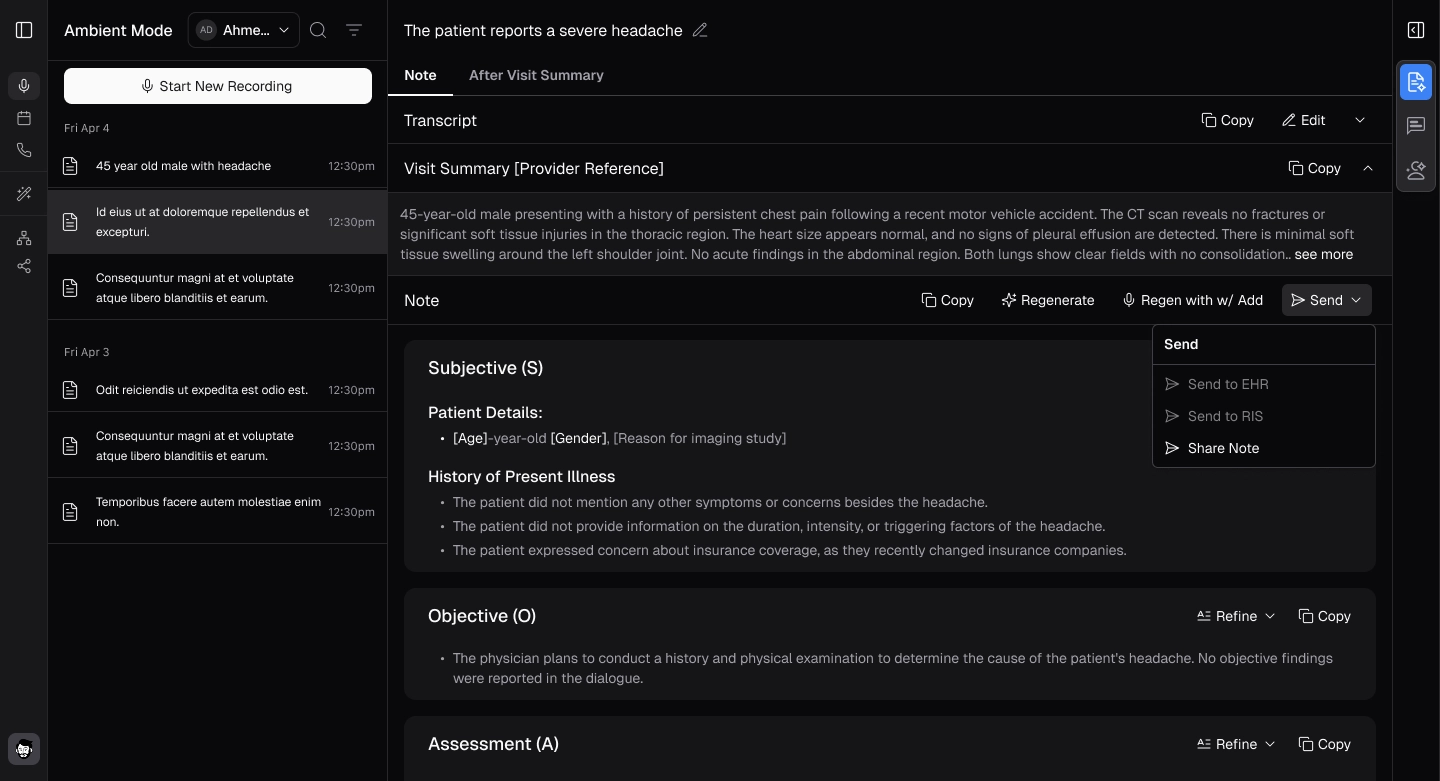
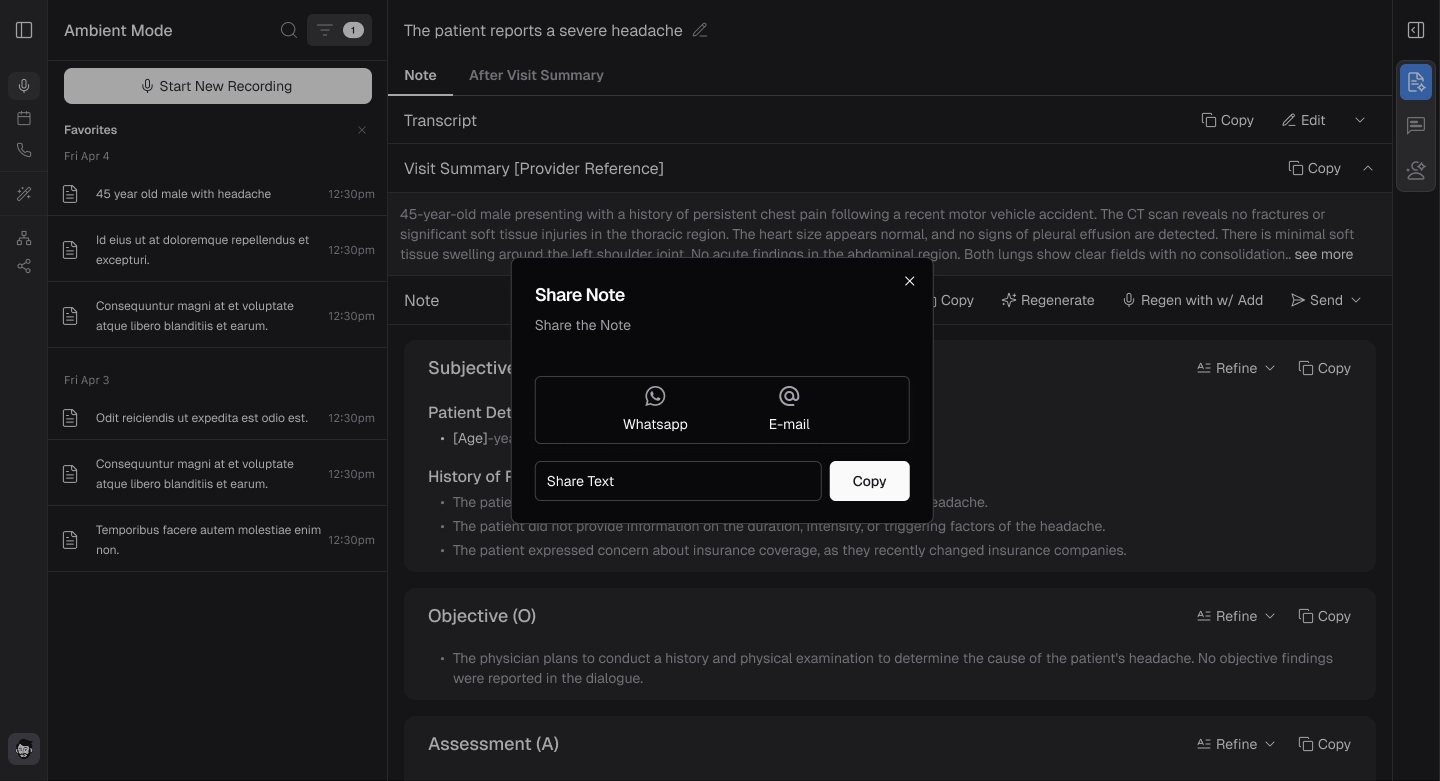
Sending
- To send a note, click "Send" and then select "Share" from the dropdown list that appears.
- The note can be shared via email or WhatsApp, along with the accompanying text shown in the popup notification that appears.
Connection Error
- If there is a connection issue preventing recording completion, a popup will display an internet connection error.
- Click 'Resume' to continue recording once you are back online.
.webp)
.webp)
Smart Suggestions
- The CliniEnhance panel is displayed on the right side of the screen.
- When you click the "Generate" button, smart suggestions automatically appear.
- Suggestions are grouped into three categories: Critical, Important, and Recommended.
.webp)
.webp)
- You can easily apply any smart suggestion by clicking the checkmark, or skip it by clicking the cross.
- When you accept a suggestion, it's directly added to the transcript.
- You can also view the rationale for each smart suggestion, including explanations of why it is important to add.
.webp)
.webp)
.webp)
CliniChat in Ambient Mode
- In Ambient Mode, click the CliniChat button displayed on the far right, located beneath the CliniEnhance button.
- A notification will appear informing you that CliniChat is strictly for experimental use.
- Press "I Agree" to continue.
.webp)
.webp)
- The main CliniChat screen will then be displayed on the right side of the page.
.webp)
- Enter your prompts in the chat to receive contextual responses.
.webp)
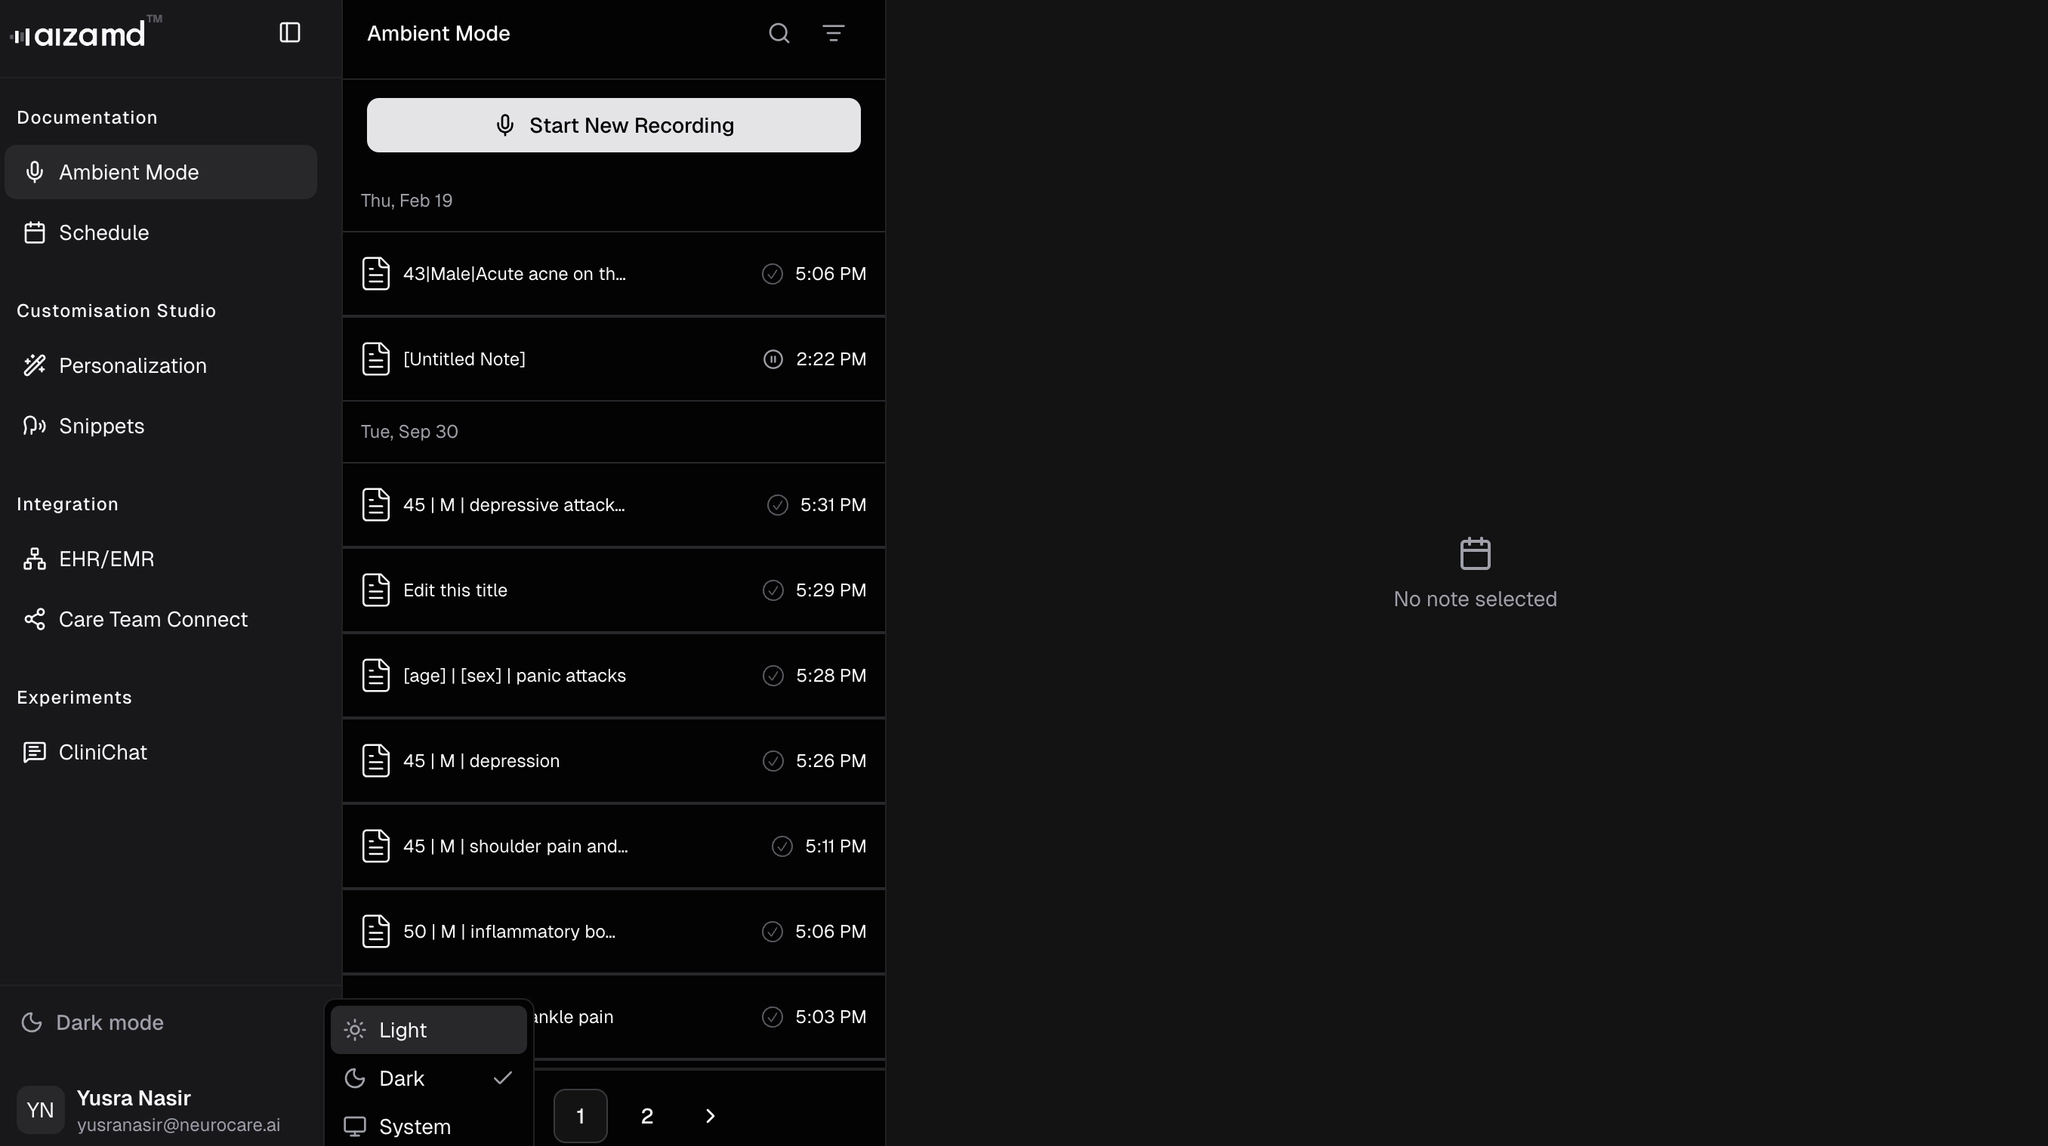
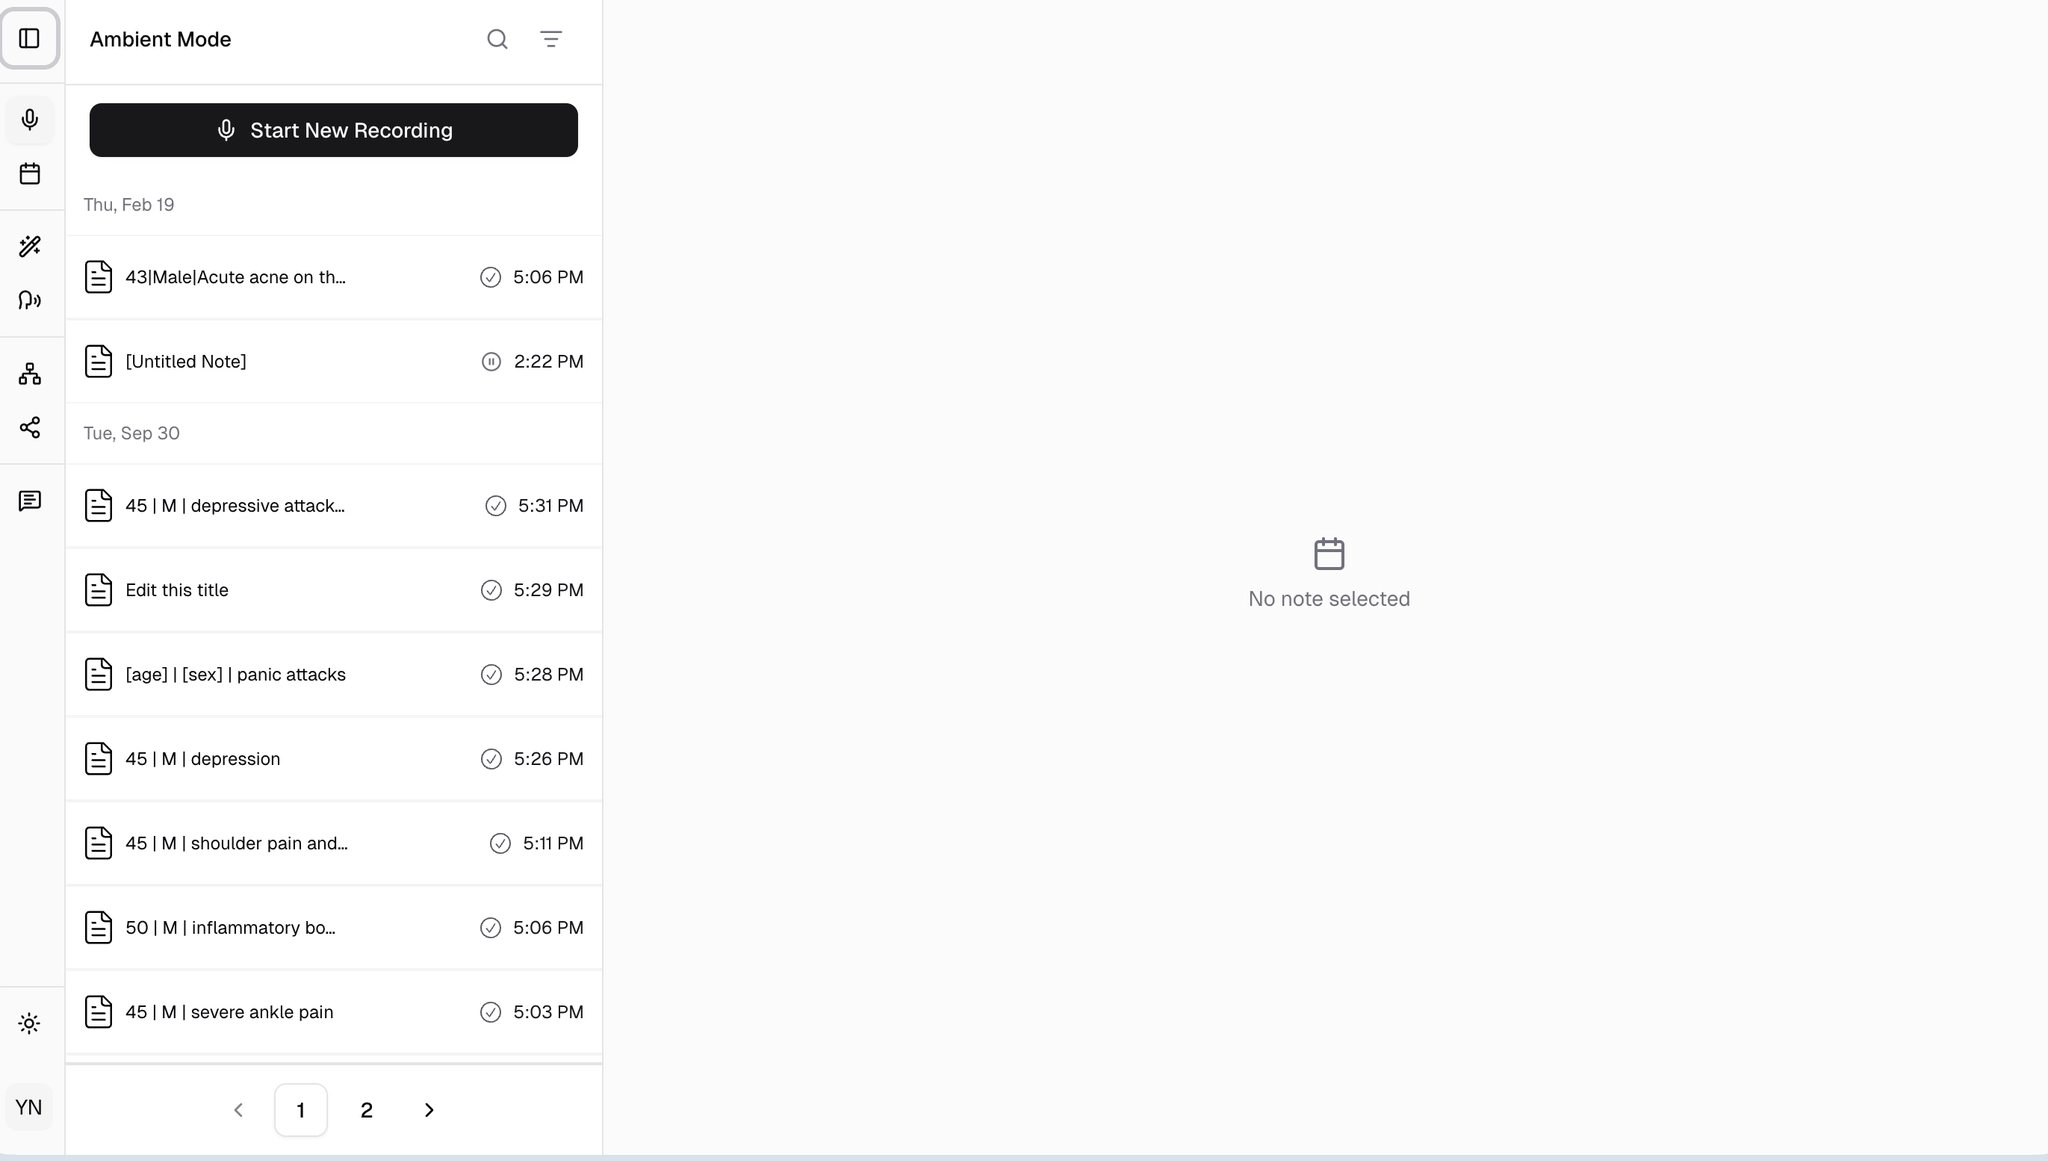
Changing System Theme
- Select 'Dark Mode' at the bottom.
- To change the theme, click on 'Light'.
- The theme will be updated.
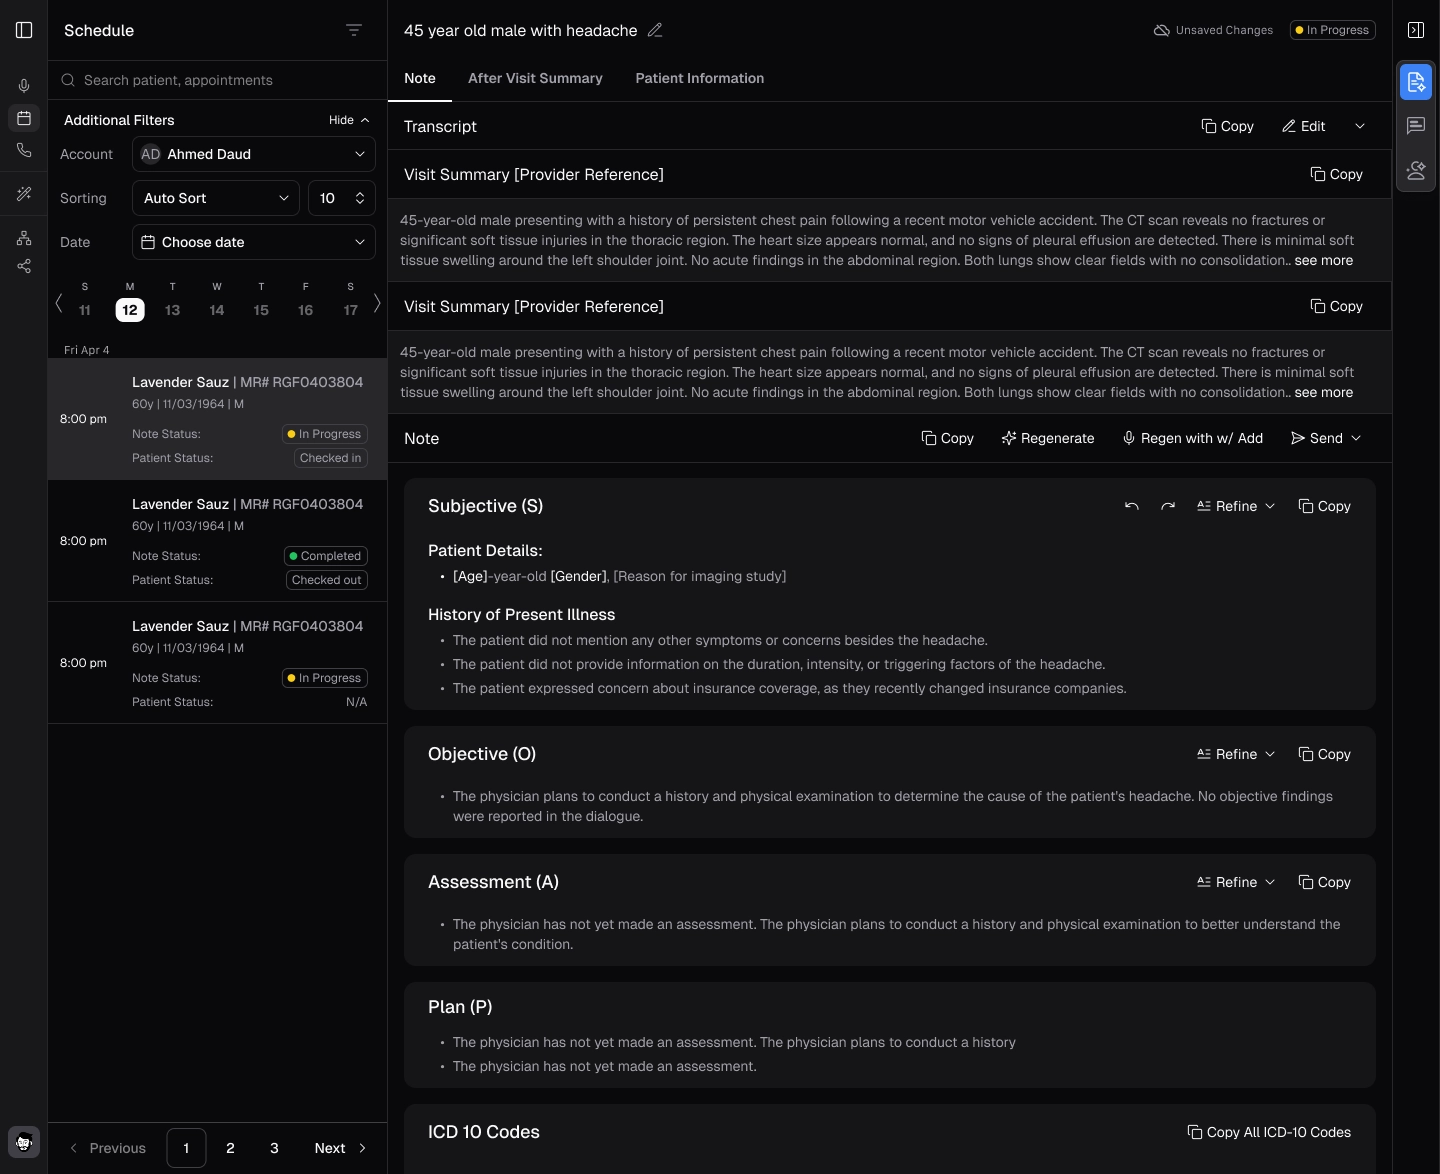
Module 2: Schedule Mode 📅
Scheduling
- To view your appointments, click on "Schedule" located right beneath Ambient Mode.
- Click on the respective dates to view your scheduled appointments for that day. These can be chosen from the dropdown list.
- The appointments along with their scheduled times will then be displayed.
.webp)
.webp)
- On the left panel, as you select an appointment, the complete data will appear displaying the Note, After Visit Summary, and patient information.
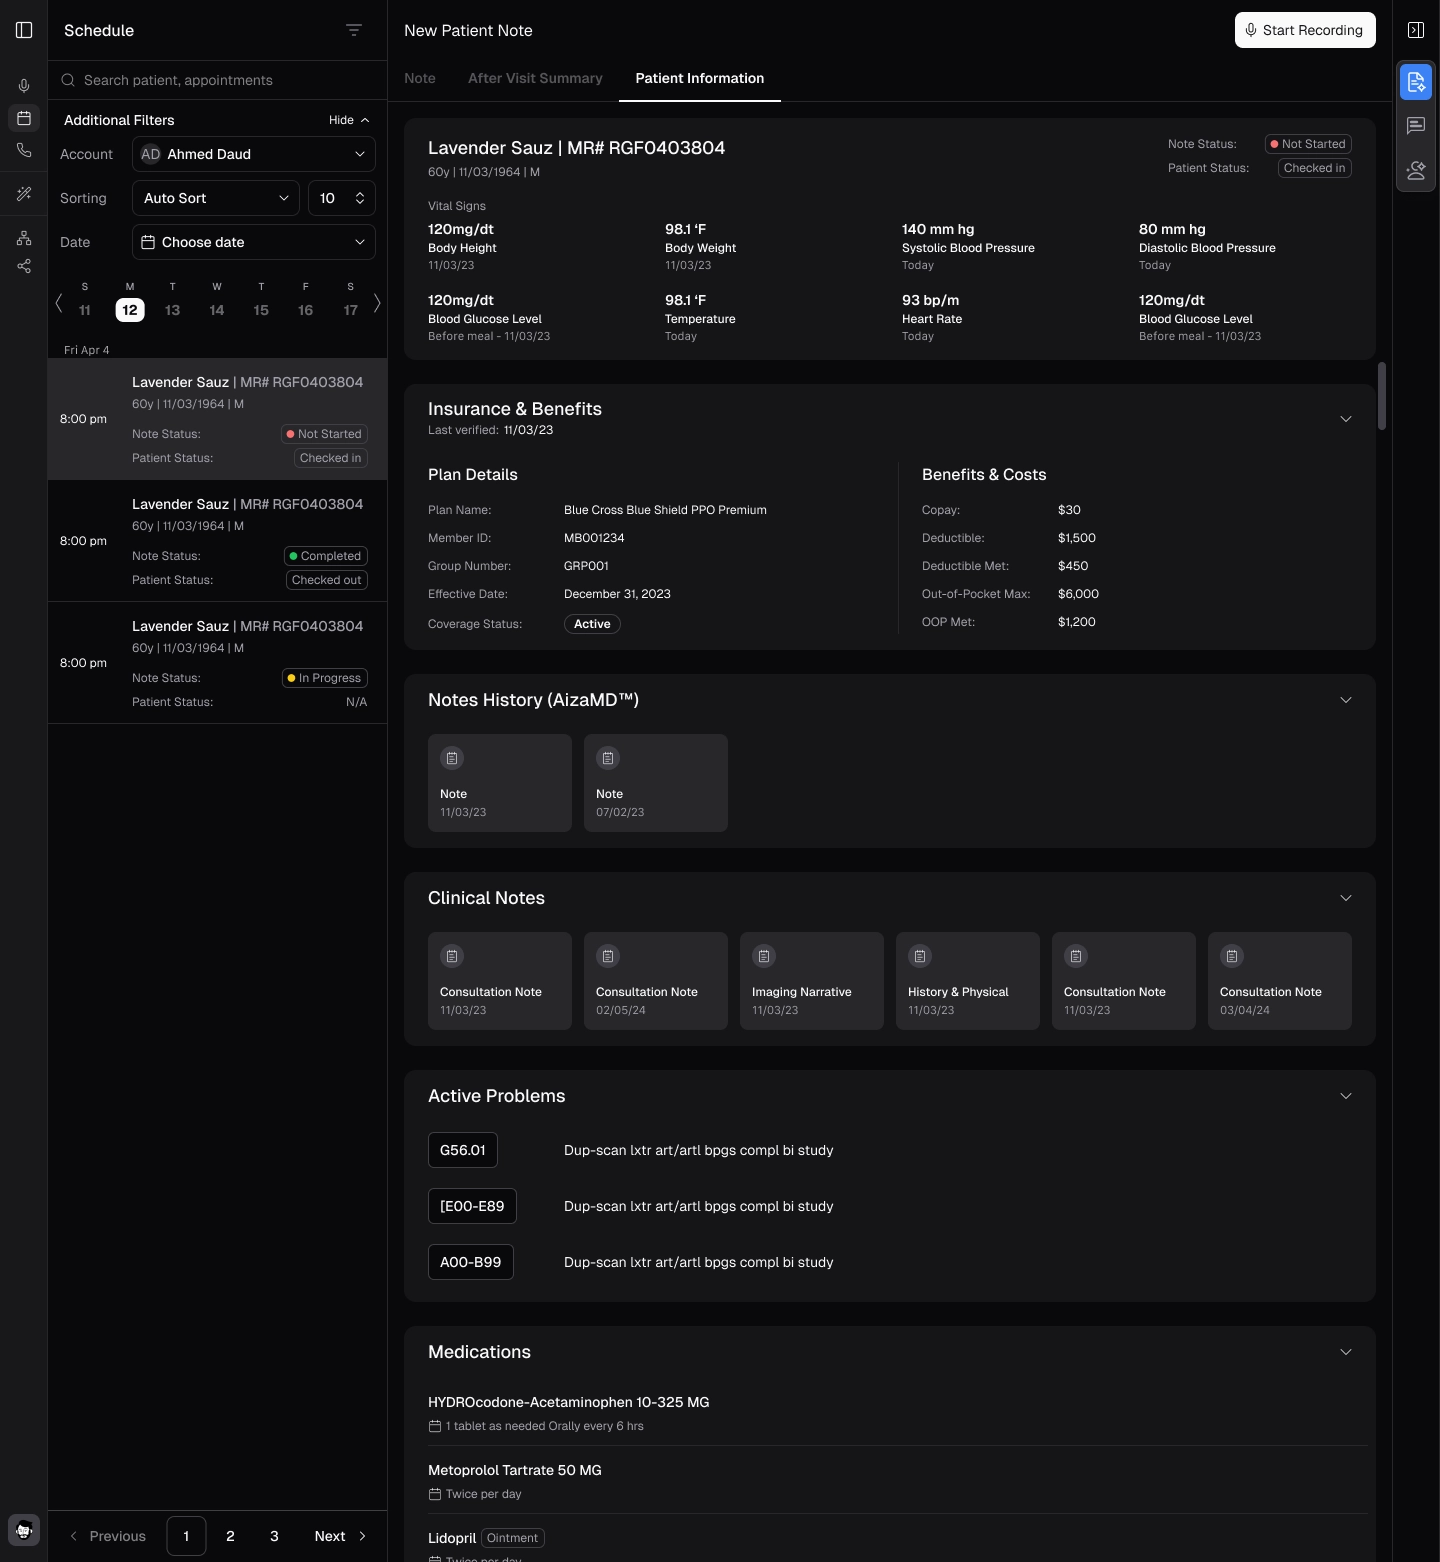
Managing Schedule
- The appointments are displayed as Not Started, In Progress, or Completed.
- To complete a Not Started appointment click on it. Then start the recording process as described earlier in Ambient Mode.
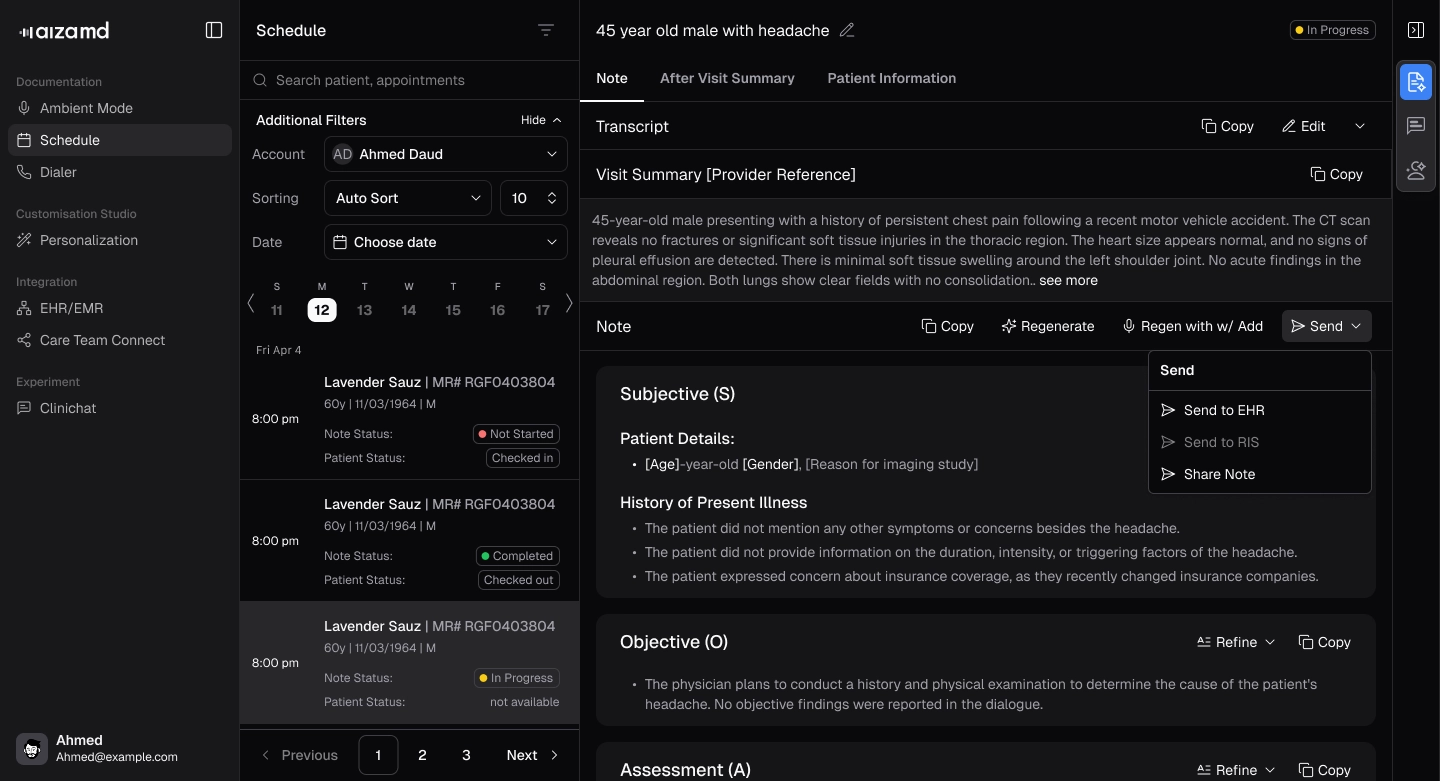
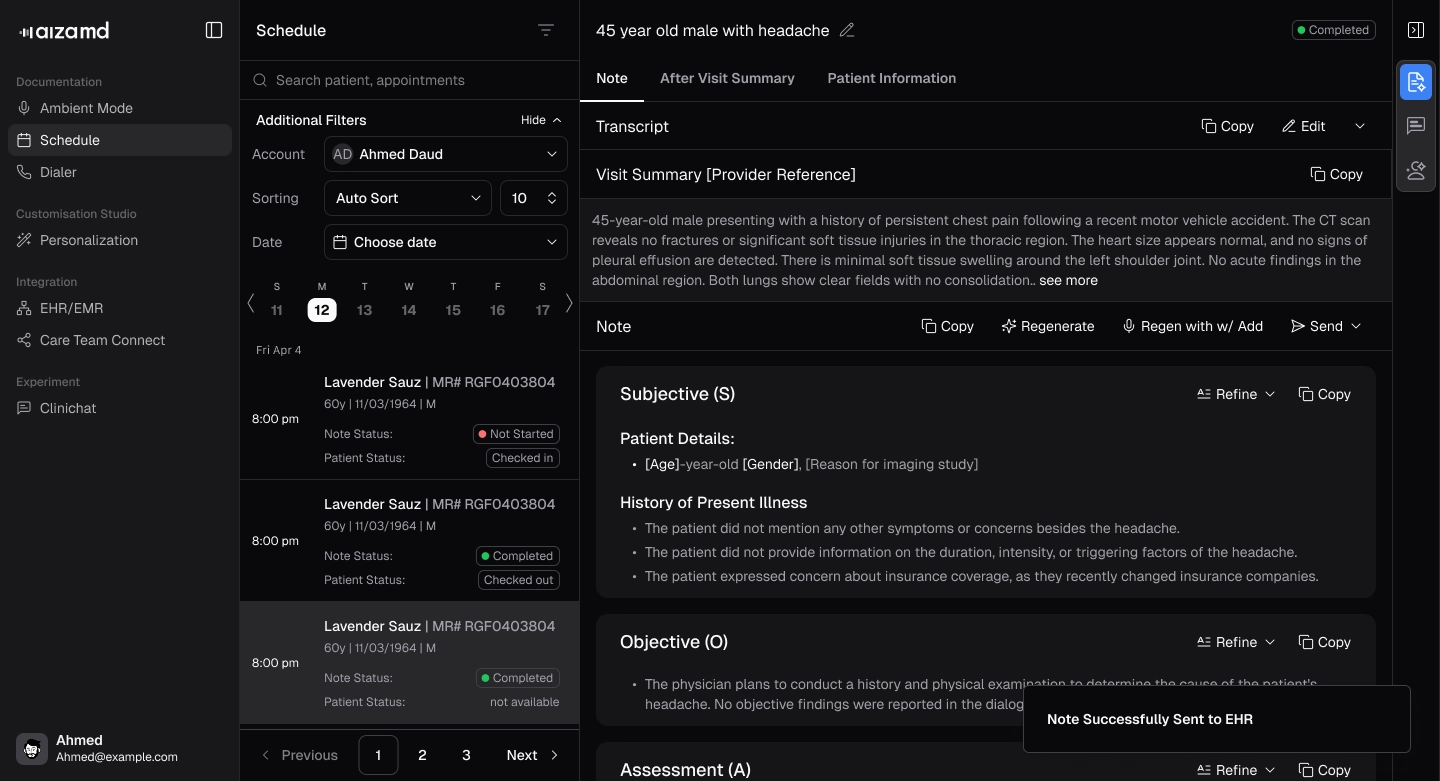
Sending to EHR
- Select the appointment which has the status of 'In Progress'.
- Click on 'Send' to open the dropdown list.
- Click on 'Send to EHR'.
.webp)
Module 3: CliniChat 📝
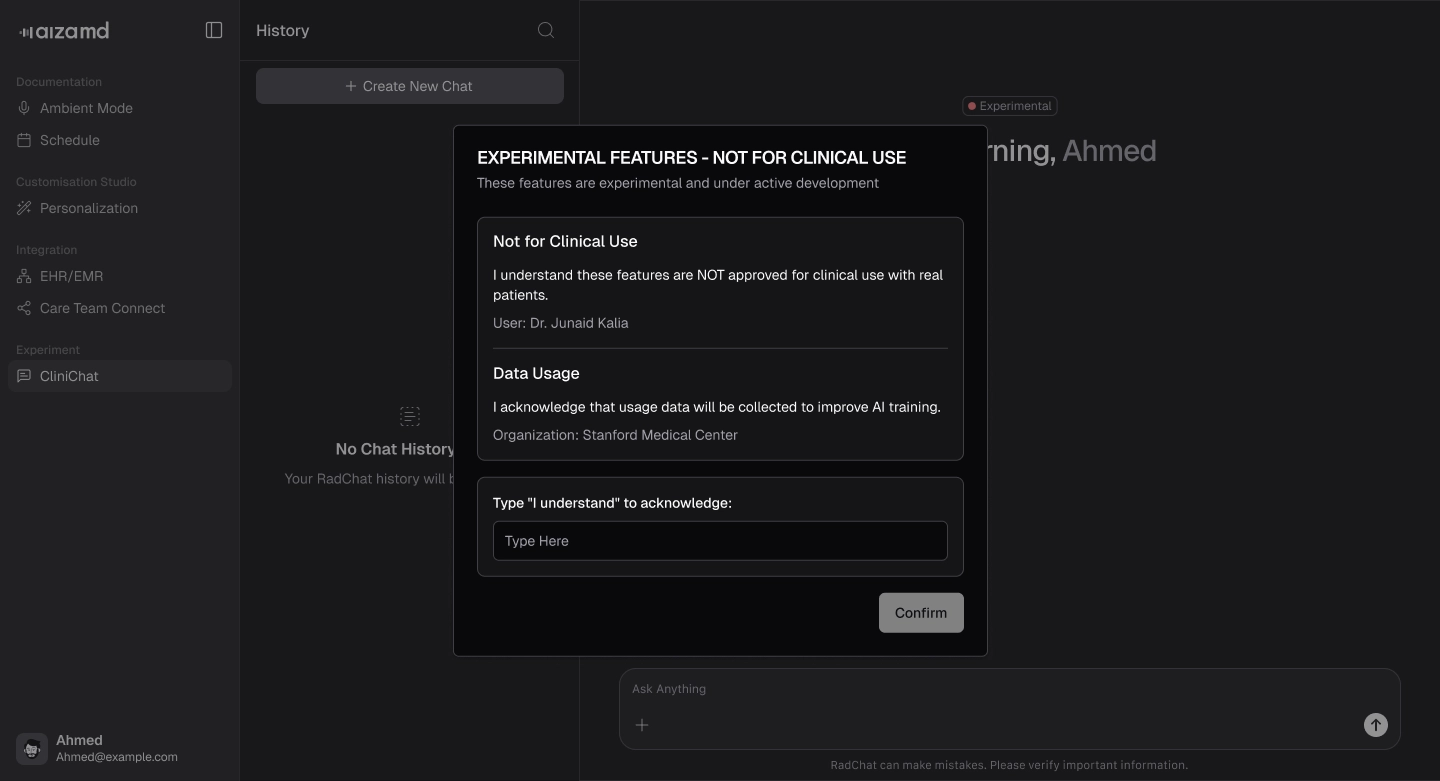
- Navigate to the CliniChat module from the left menu.
- A popup will appear showing that CliniChat is for experimental purposes only. Click on "Confirm" to move forward.
.webp)
- Enter your practice specific questions in the chat box and click the arrow on the right to submit.
- CliniChat generates detailed, context-aware responses based on your input.
- View your chat history conveniently displayed on the side.
.webp)
.webp)
- To upload images, click the plus (+) sign.
.webp)
Module 4: CareTeam Connect 🔄
Multi-User Access
- Select CareTeam Connect from the left side menu.
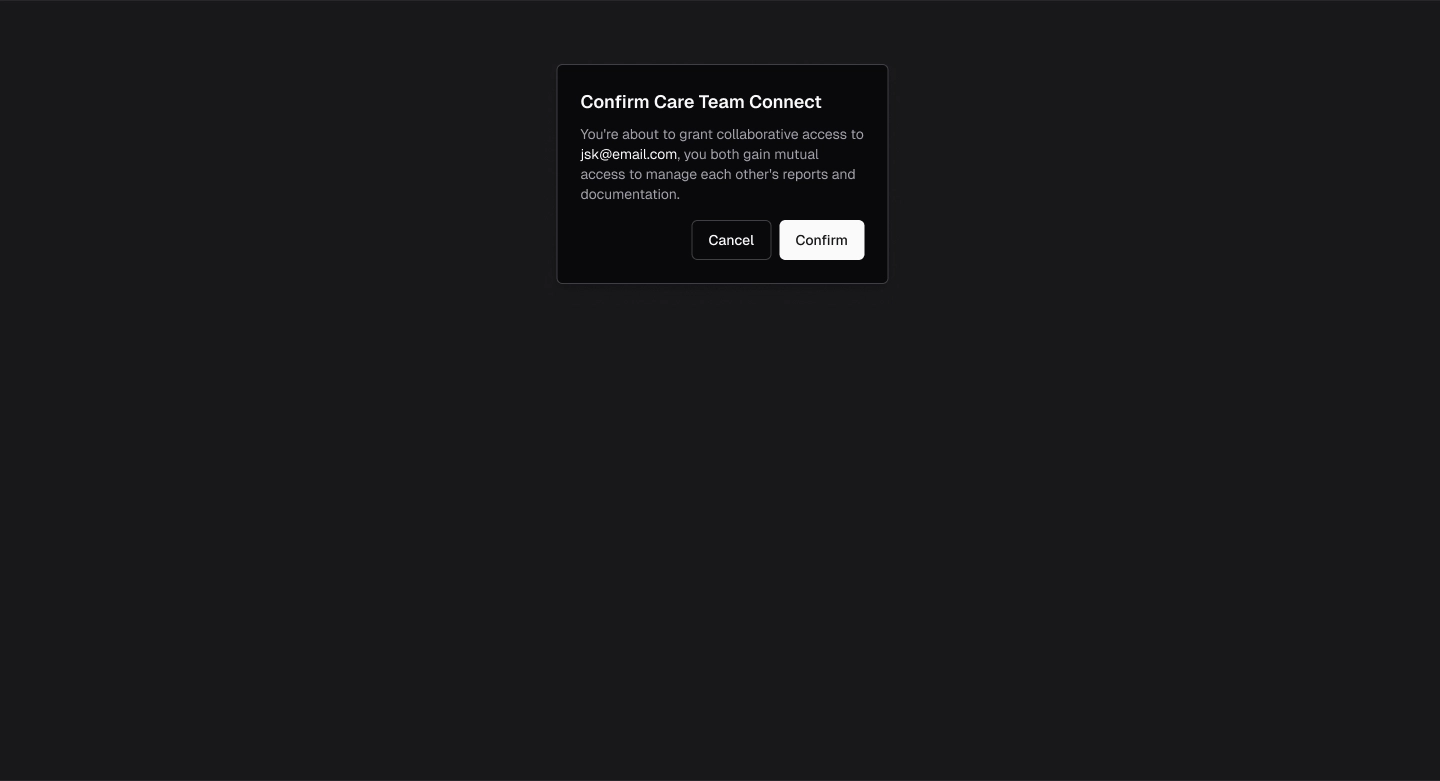
- Enter the email address of the person you want to collaborate with (e.g., a colleague, nurse practitioner, or other healthcare professional).
- Click "Invite" to send the link directly to their email.
- A popup notification will appear asking for confirmation.
- The recipient will receive an email notification to accept the invite.
- Once the access request is accepted, the connected person will have access to view and collaborate on your notes, allowing for faster teamwork and efficient patient management.
.webp)
.webp)
.webp)
Access Control
- You can choose to edit, pause access, or delete a user by clicking on the three dots and selecting "Revoke Access".
.webp)
.webp)
- Pending requests asking for collaboration access can be accepted by the document owners. Click the arrow in the red highlighted area.
.webp)
- Accept or reject pending requests. Requests will be approved or denied accordingly.
.webp)
Module 5: Snippets 🔖
Add custom text in clinical notes via Intelligent Trigger Workflows
- From the left side of the main menu within Customization Studio, select "Snippets".
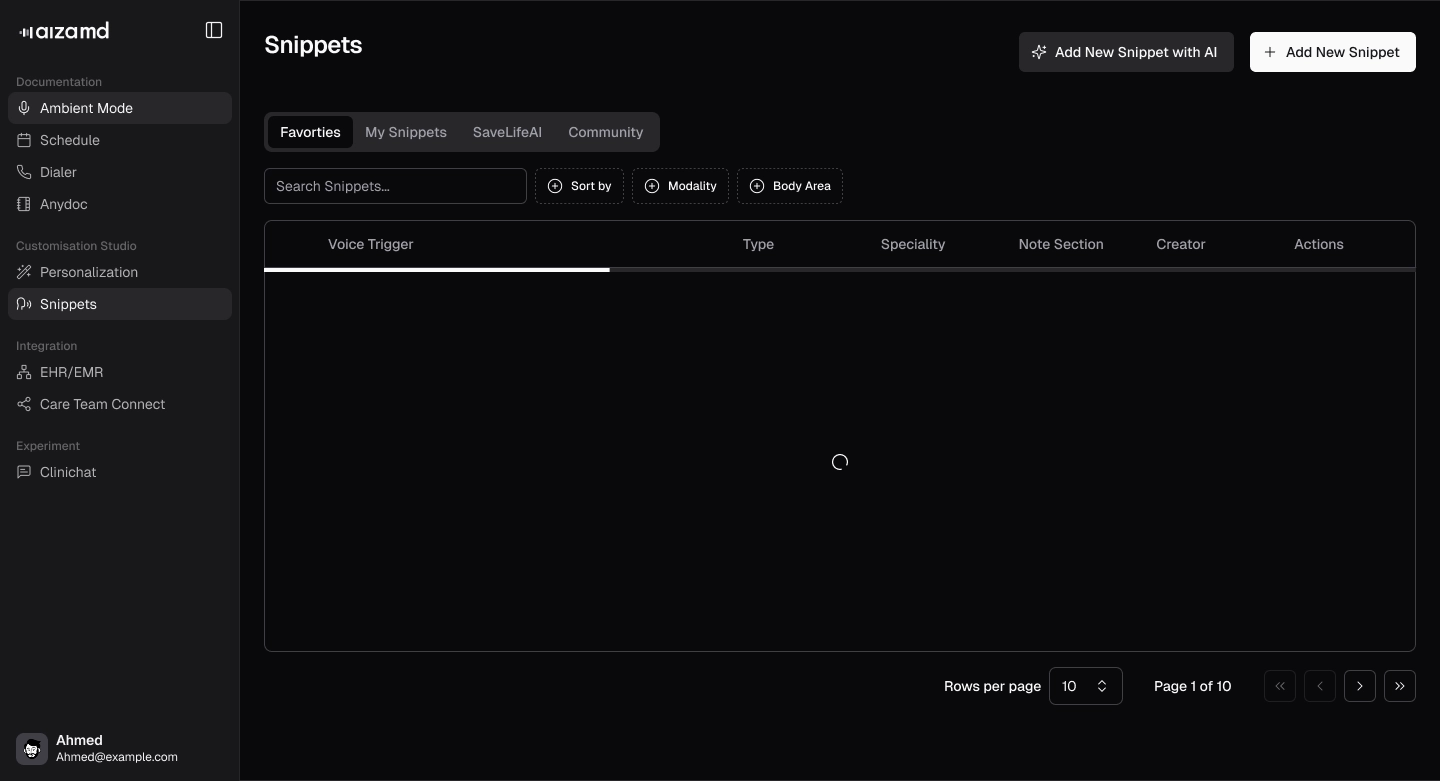
- To add a new snippet, click on the Add New Snippet button.
.webp)
- Enter the Voice Trigger, then select the Type, Specialty, Use, and Note Section from the dropdown lists.
Key Tip: When creating or editing a snippet, select your preferred integration method in the Use section from among three options:
- Verbatim: Appends your snippet to the end of the existing subjective section.
- Replace: Overwrites the entire subjective section (based on selected specialty) with your snippet.
- Enhance: Intelligently merges your snippet with the AI-generated subjective section into one cohesive block.
- Press Save.
.webp)
.webp)
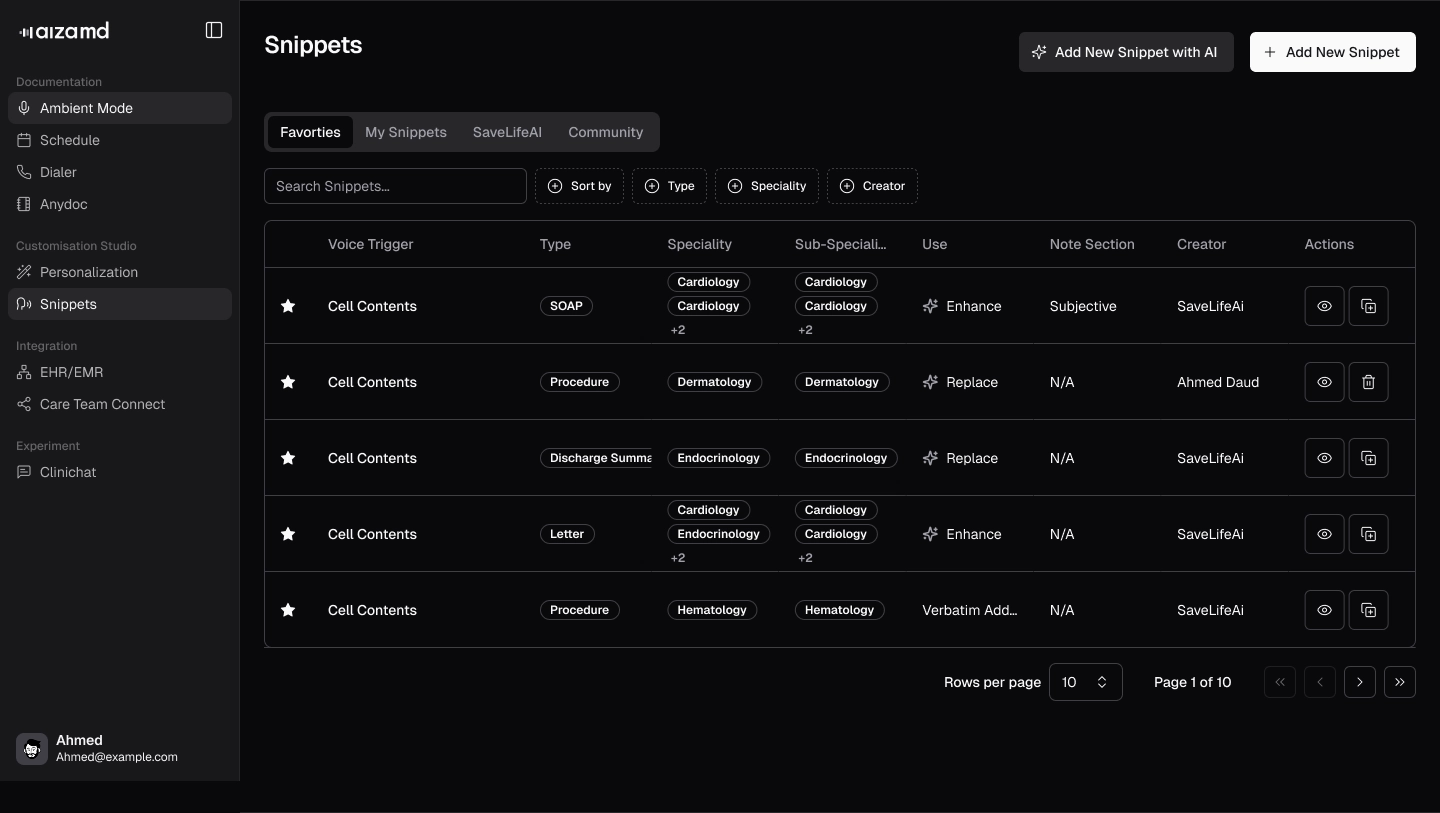
- Snippets can be marked as Favorites by pressing the star. The list will be viewable in Favorites.
.webp)
- In My Snippets, user-created snippets appear. All snippets can be searched for or viewed here.
.webp)
Add Snippets with AI
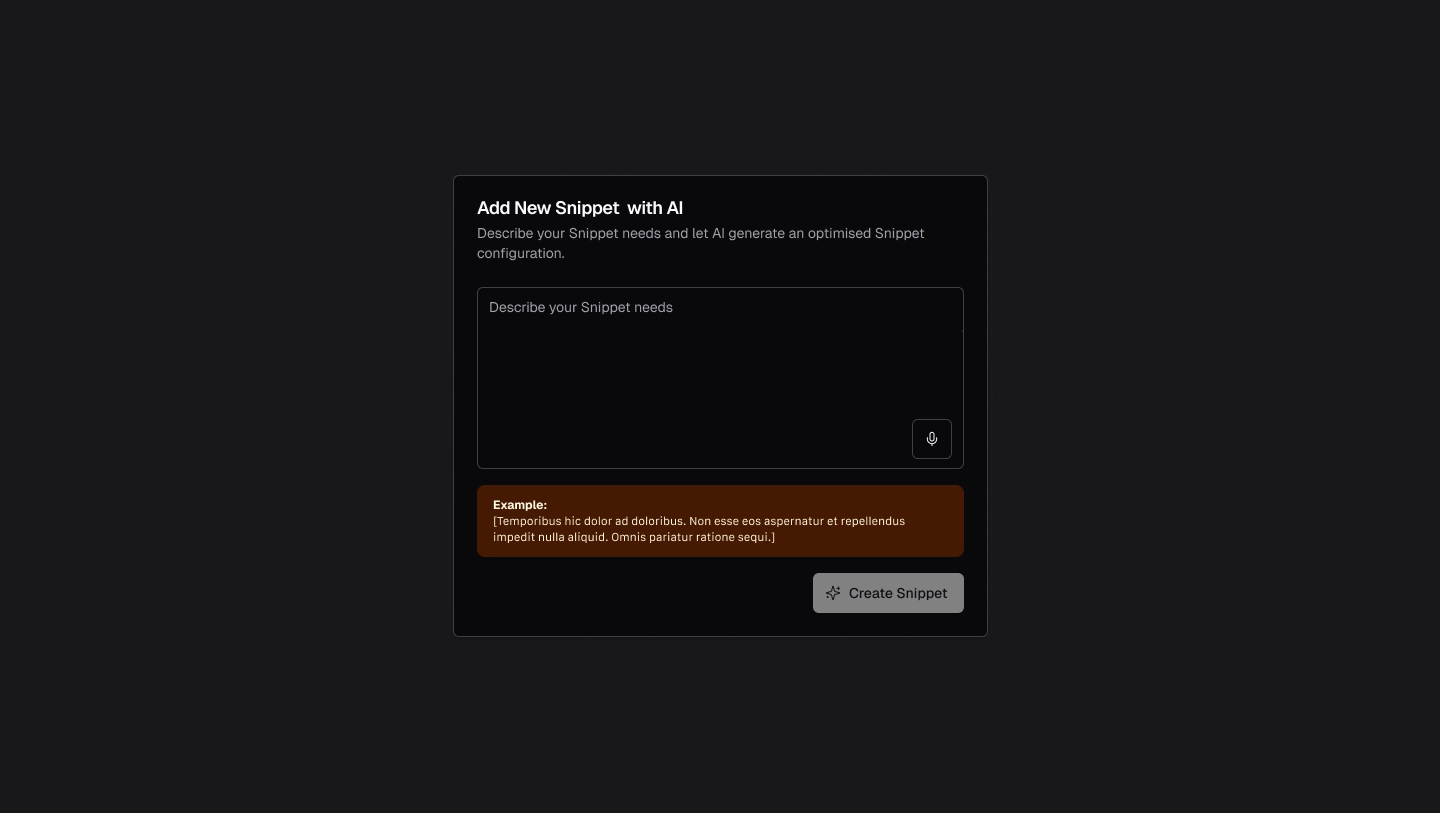
- Click Add New Snippet with AI.
- A popup will open asking you to describe the content of the snippet.
- Describe your snippet.
- Click on Create Snippet.
.webp)
.webp)
.webp)
Using Snippets in Ambient Mode
- From the side panel, click Ambient Mode.
- Start a new recording in Ambient Mode (see earlier section).
- While recording, use the exact phrases: "Insert Template [Snippet Name]", Example: "Insert Template XRAY Report". Multiple triggers can be used.
- The system automatically inserts the matching snippet.
- Once snippets are integrated, scroll through the generated SOAP note to see the results.
.webp)
%20(1).webp)
Module 6: EHR/EMR Connect ➡️ ⬅️
Access integrated clinical systems
- Select EHR/EMR from the left side panel.
- Click the downward arrow next to Select EHR to view the dropdown list of all major EHR systems.
- Select the EHR.
.webp)
.webp)
.webp)
- Clicking your EHR selection will redirect you to the external site for final configuration and authentication in case of Epic, Cerner, Athena & ECW.
- Enter your provider credentials, login and configure from there.
- Once configured, you will return to the platform to view your connected EHR status.
.webp)
- Only in cases of Athena and ModMed connection, a popup asking to select provider will be displayed.
.webp)
- Choose your provider from the dropdown.
.webp)
- The EHR will be displayed as 'Connected' in green.
- From the left panel, navigate to Schedule to verify your EHR connection status and appointment syncing.
- It can then be sent to the EHR as described earlier in schedule mode.
- In case of disconnection, click on Disconnect displayed in red.
- A popup will be displayed asking if you would like to disconnect from CarePro.
- Select Disconnect or Cancel as per the requirements.
.webp)
%20(1).webp)